Examples
Add an attachment to an email
For this example, let’s assume we want to send out customer a quote for the new product they’ve ordered. The quote will be provided by our template system.
|
In order to render templates as PDF documents, PDF rendering must be setup. |
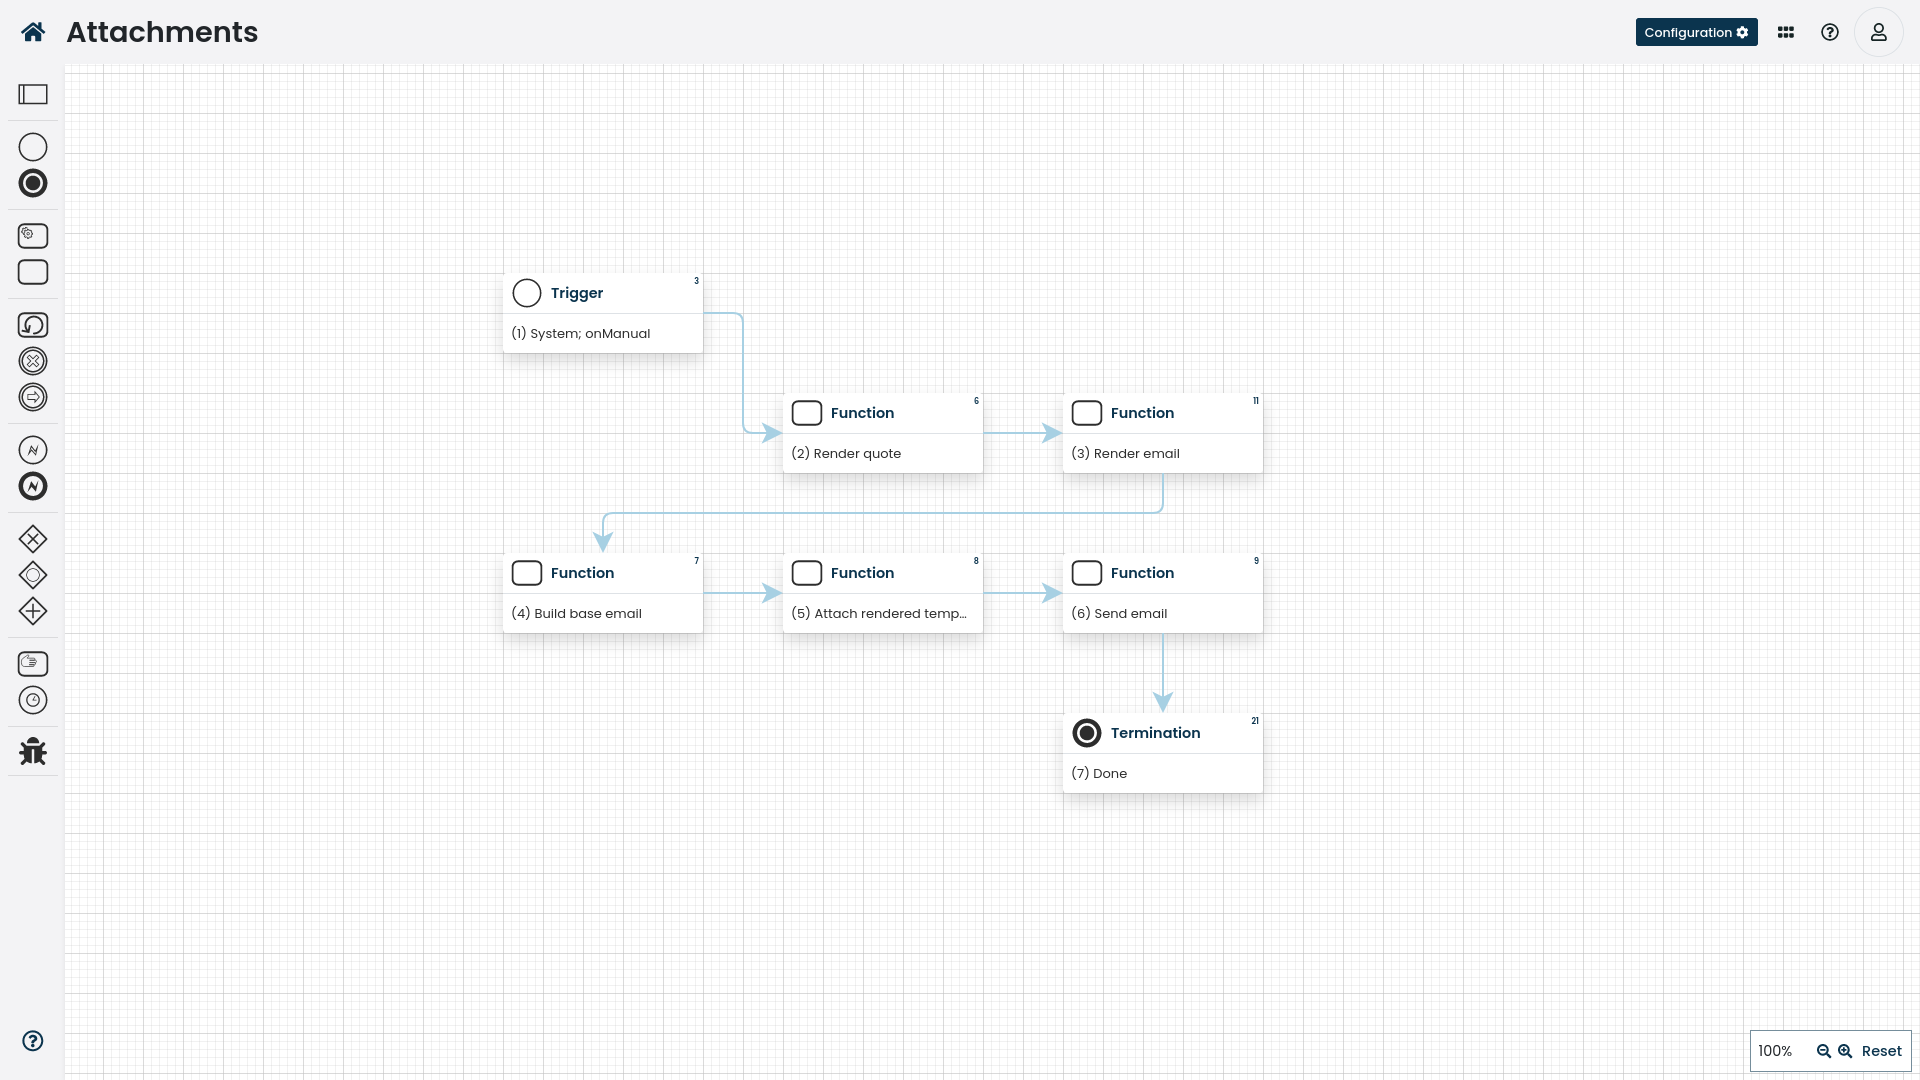
The source code for the workflow example.
|
Make sure that the |
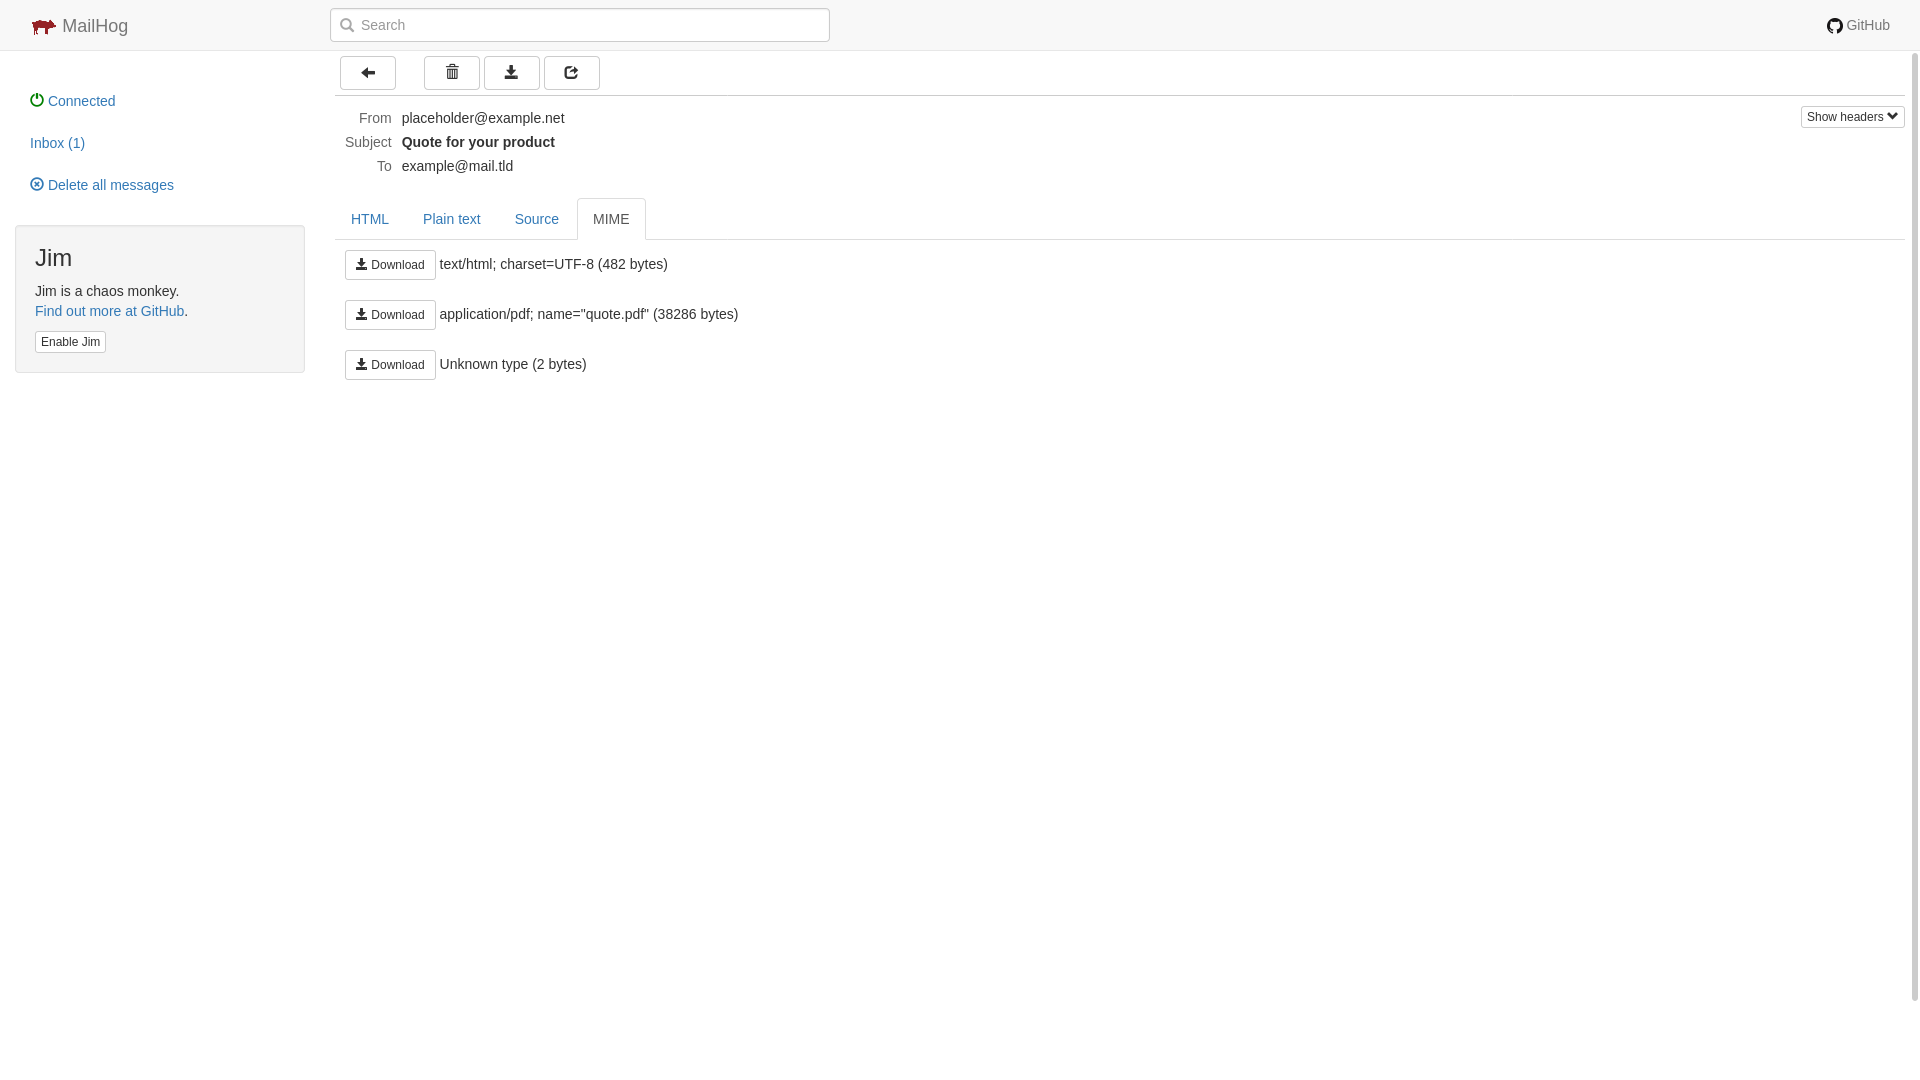
The resulting email message includes the quote PDF as an attachment.
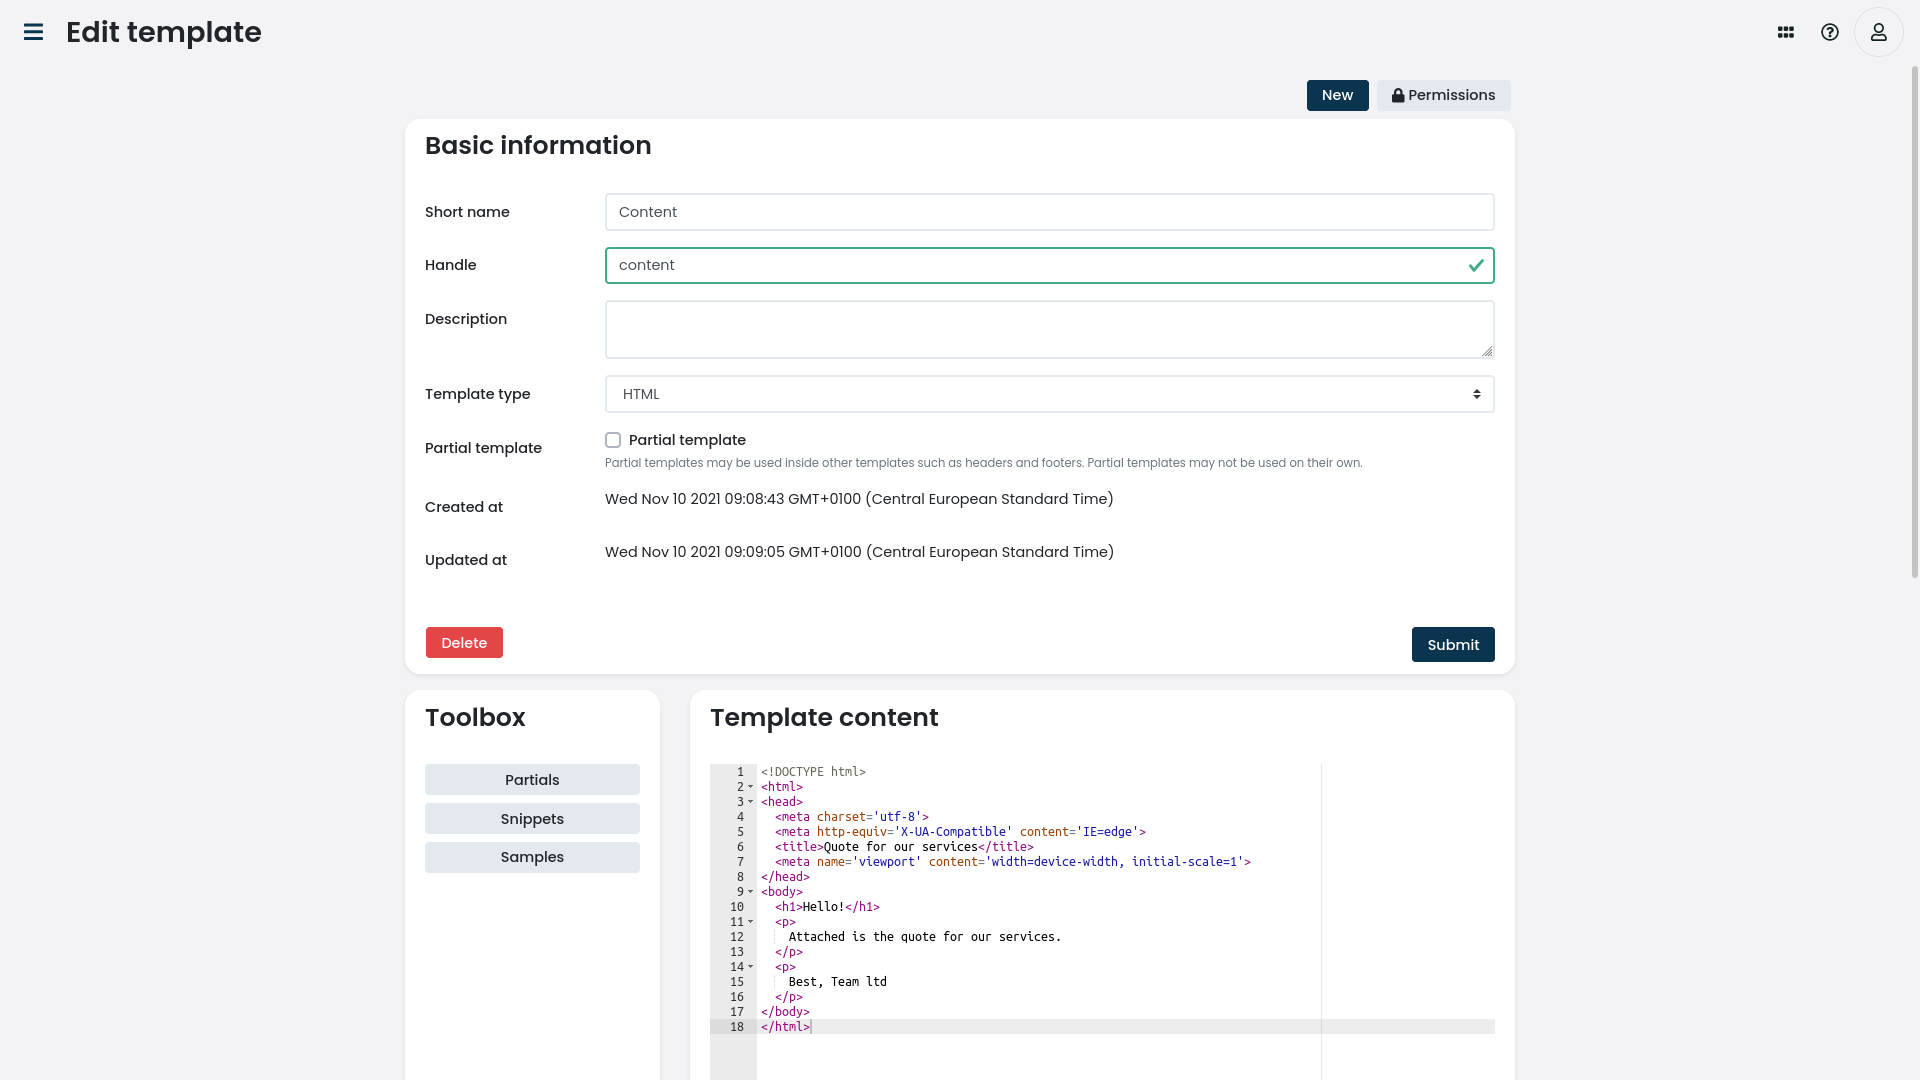
Example templates
The above example uses two templates: quote and content
<!DOCTYPE html>
<html>
<head>
  <meta charset='utf-8'>
  <meta http-equiv='X-UA-Compatible' content='IE=edge'>
  <title>Quote for our services</title>
  <meta name='viewport' content='width=device-width, initial-scale=1'>
</head>
<body>
  <h1>Hello!</h1>
  <p>
    Attached is the quote for our services.
  </p>
  <p>
    Best, Team ltd
  </p>
</body>
</html>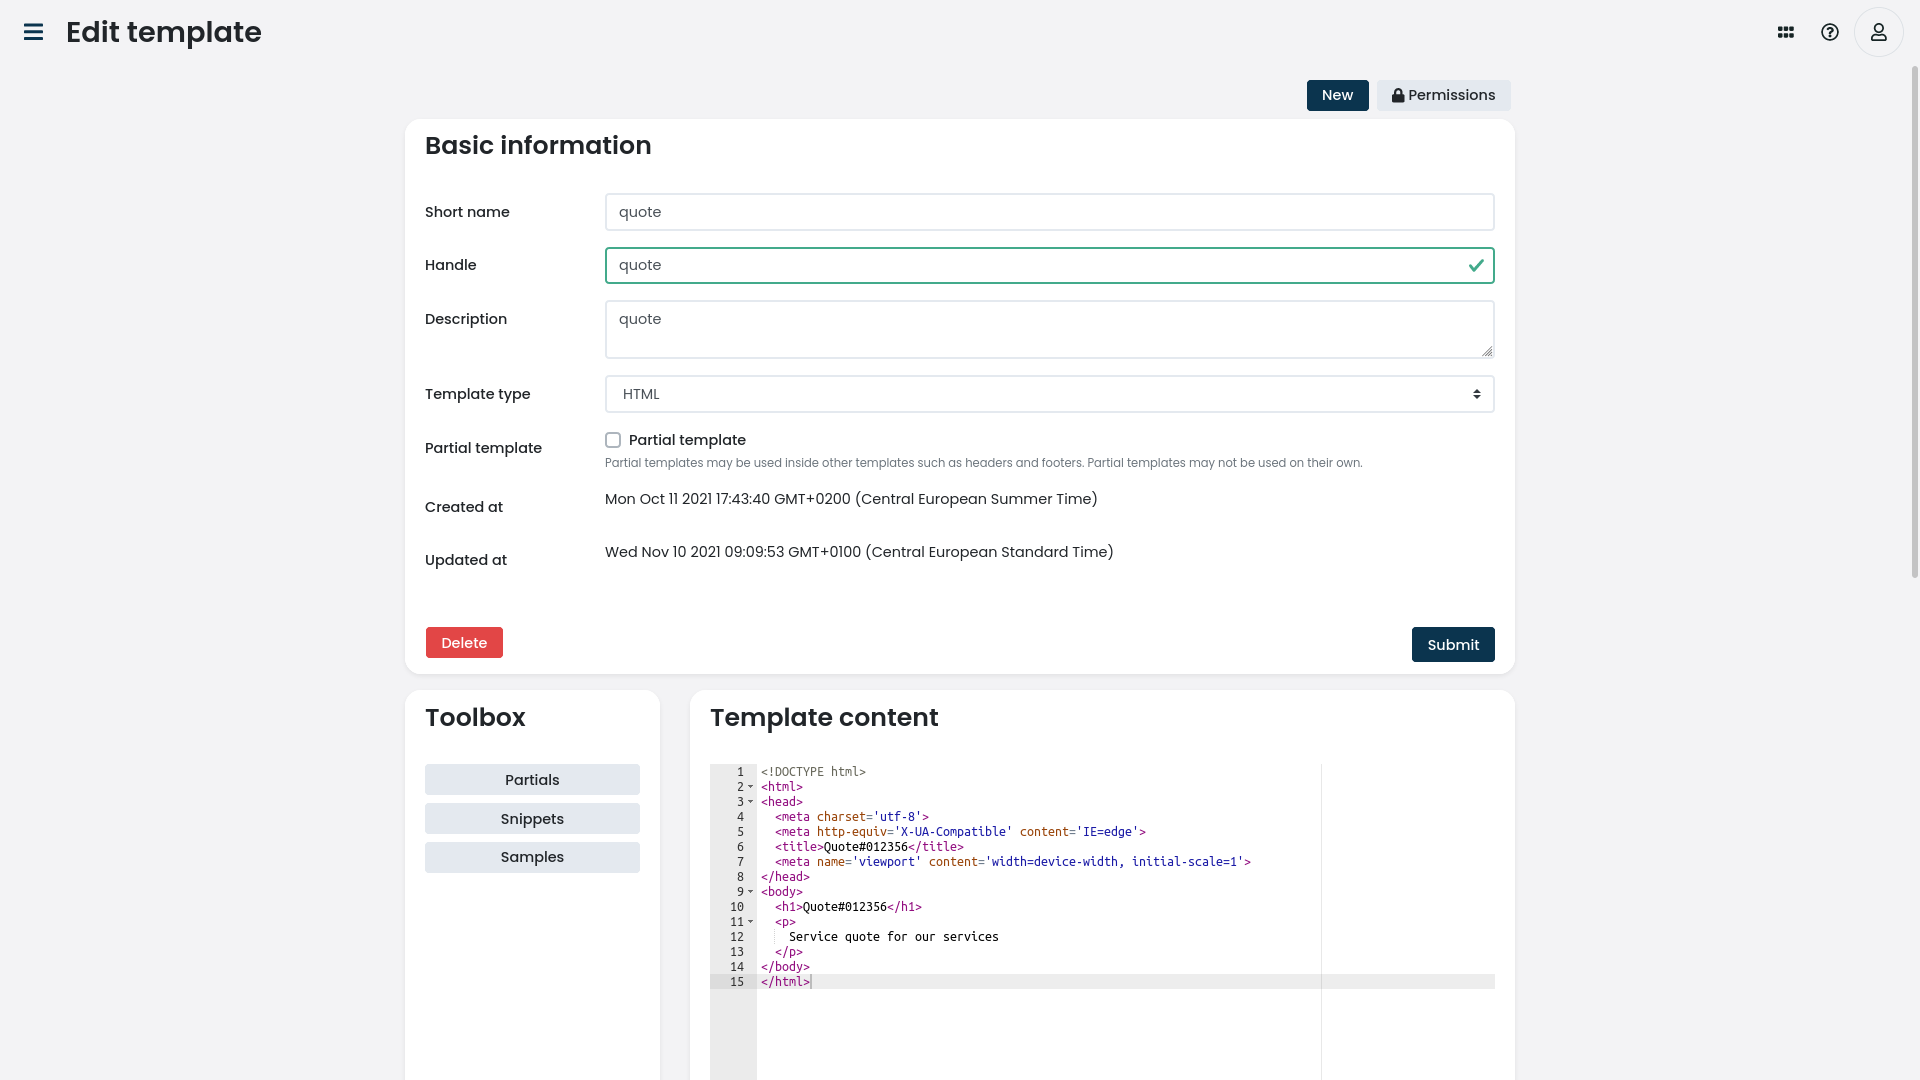
<!DOCTYPE html>
<html>
<head>
  <meta charset='utf-8'>
  <meta http-equiv='X-UA-Compatible' content='IE=edge'>
  <title>Quote#012356</title>
  <meta name='viewport' content='width=device-width, initial-scale=1'>
</head>
<body>
  <h1>Quote#012356</h1>
  <p>
    Service quote for our services
  </p>
</body>
</html>
Parse Integration Gateway Request
For this example, let’s parse a request sent to the Integration Gateway
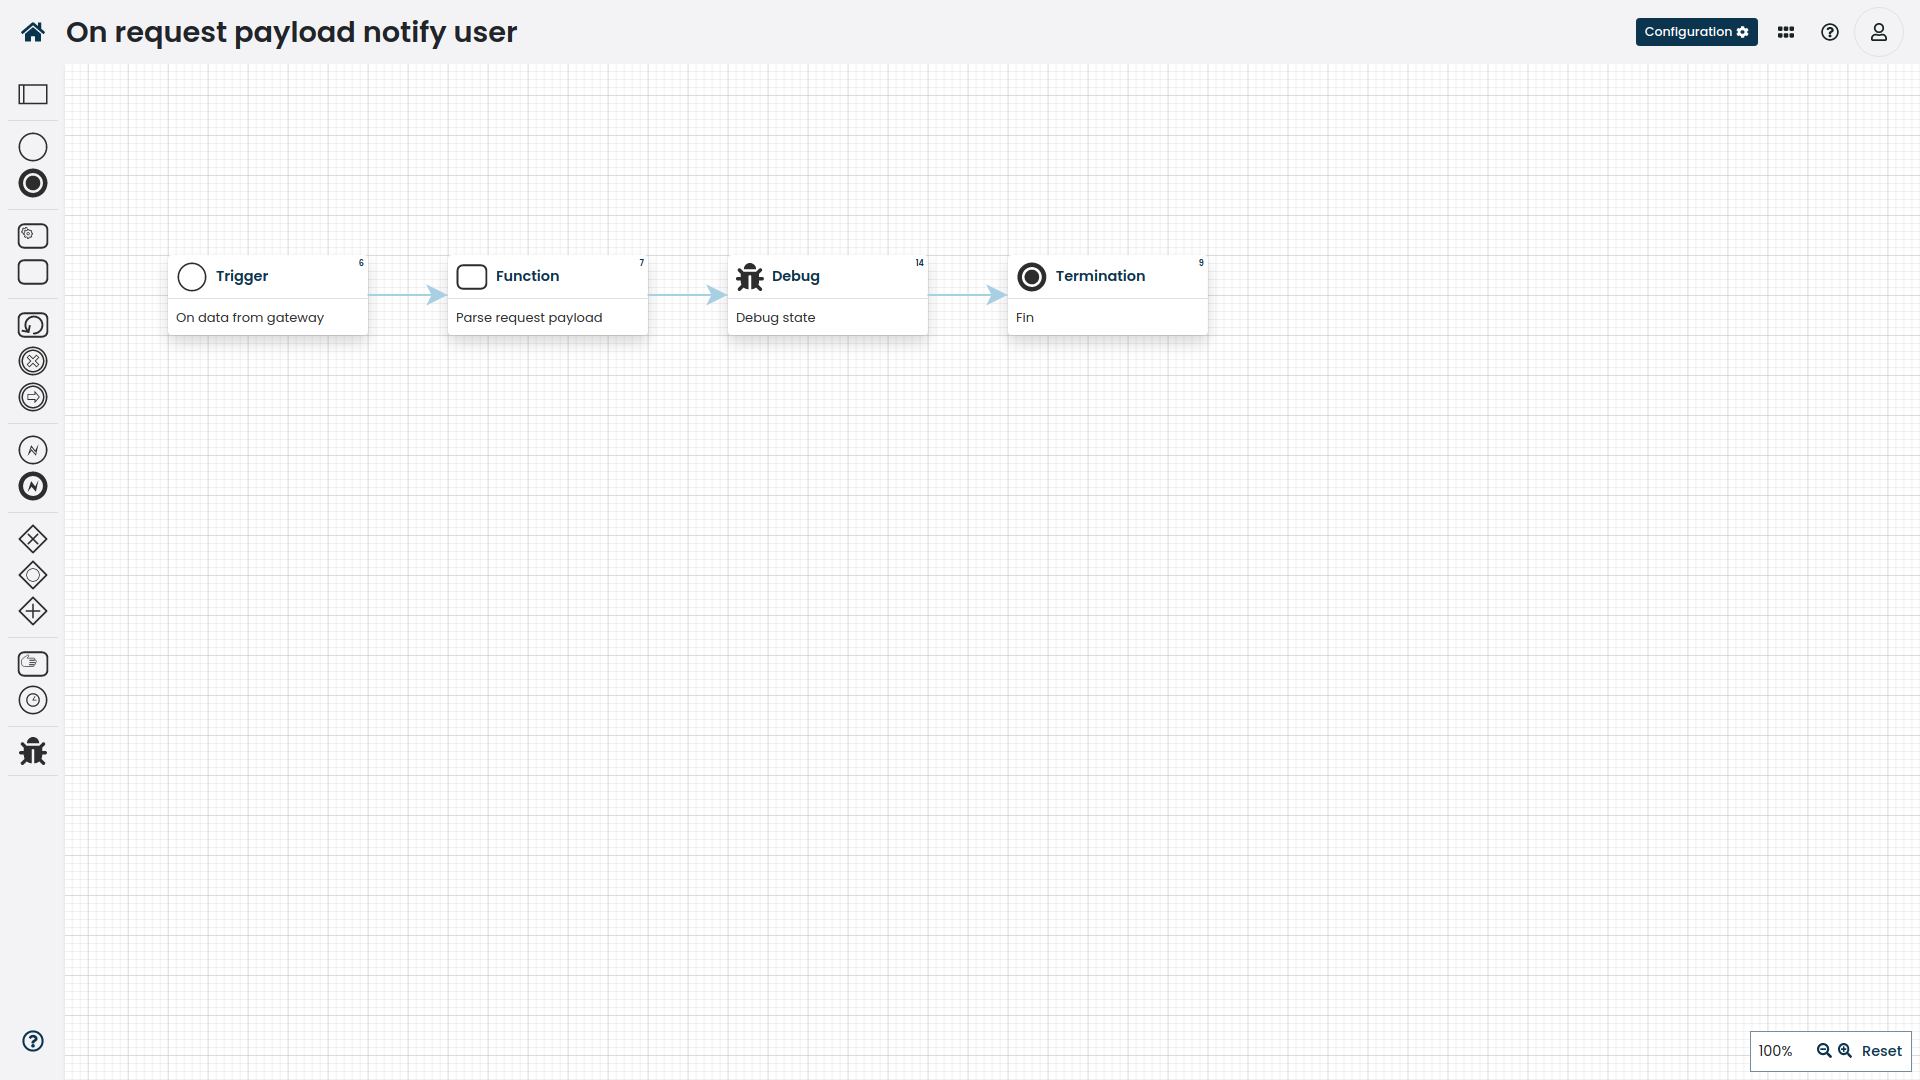
The source code for the workflow example.
Integration gateway configuration
Endpoint |
|
Prefilter |
Header: |
Processing |
Workflow processer: |
Postfilter |
|
cURL request
curl -X POST "$CORTEZA_BASE/api/gateway/examples/payload" \
  -H "Content-Type: application/json" \
  -H 'Token: SOME_SECRET_TOKEN' \
  -d '{"name":"Peter","id":123}';
JSEnv parsing function
var inputData;

try {
    inputData = JSON.parse(input)
} catch (e) {
    throw new Error('could not parse input payload: ' + e);
}

if (!inputData.name) {
    throw new Error('could not parse input payload, name missing');
}

return {
    id: inputData.id,
    name: inputData.name
}
Interval
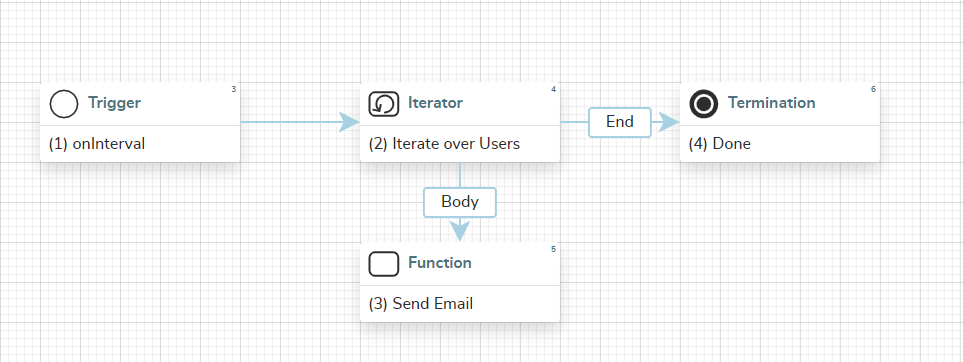
For this example, let’s assume we want to send an email to all users every Christmas at midnight.
For this, we use a trigger of type onInterval with the interval 0 0 25 12 *
Template rendering
In this example, we’ll take a look at how to render different templates that were made in our template system.
To start, create a template of type HTML in our templating system located in the admin area.
Rendering an HTML template
Create a workflow similar to the one below.
Make sure to look at the step details of steps (2) and (3).
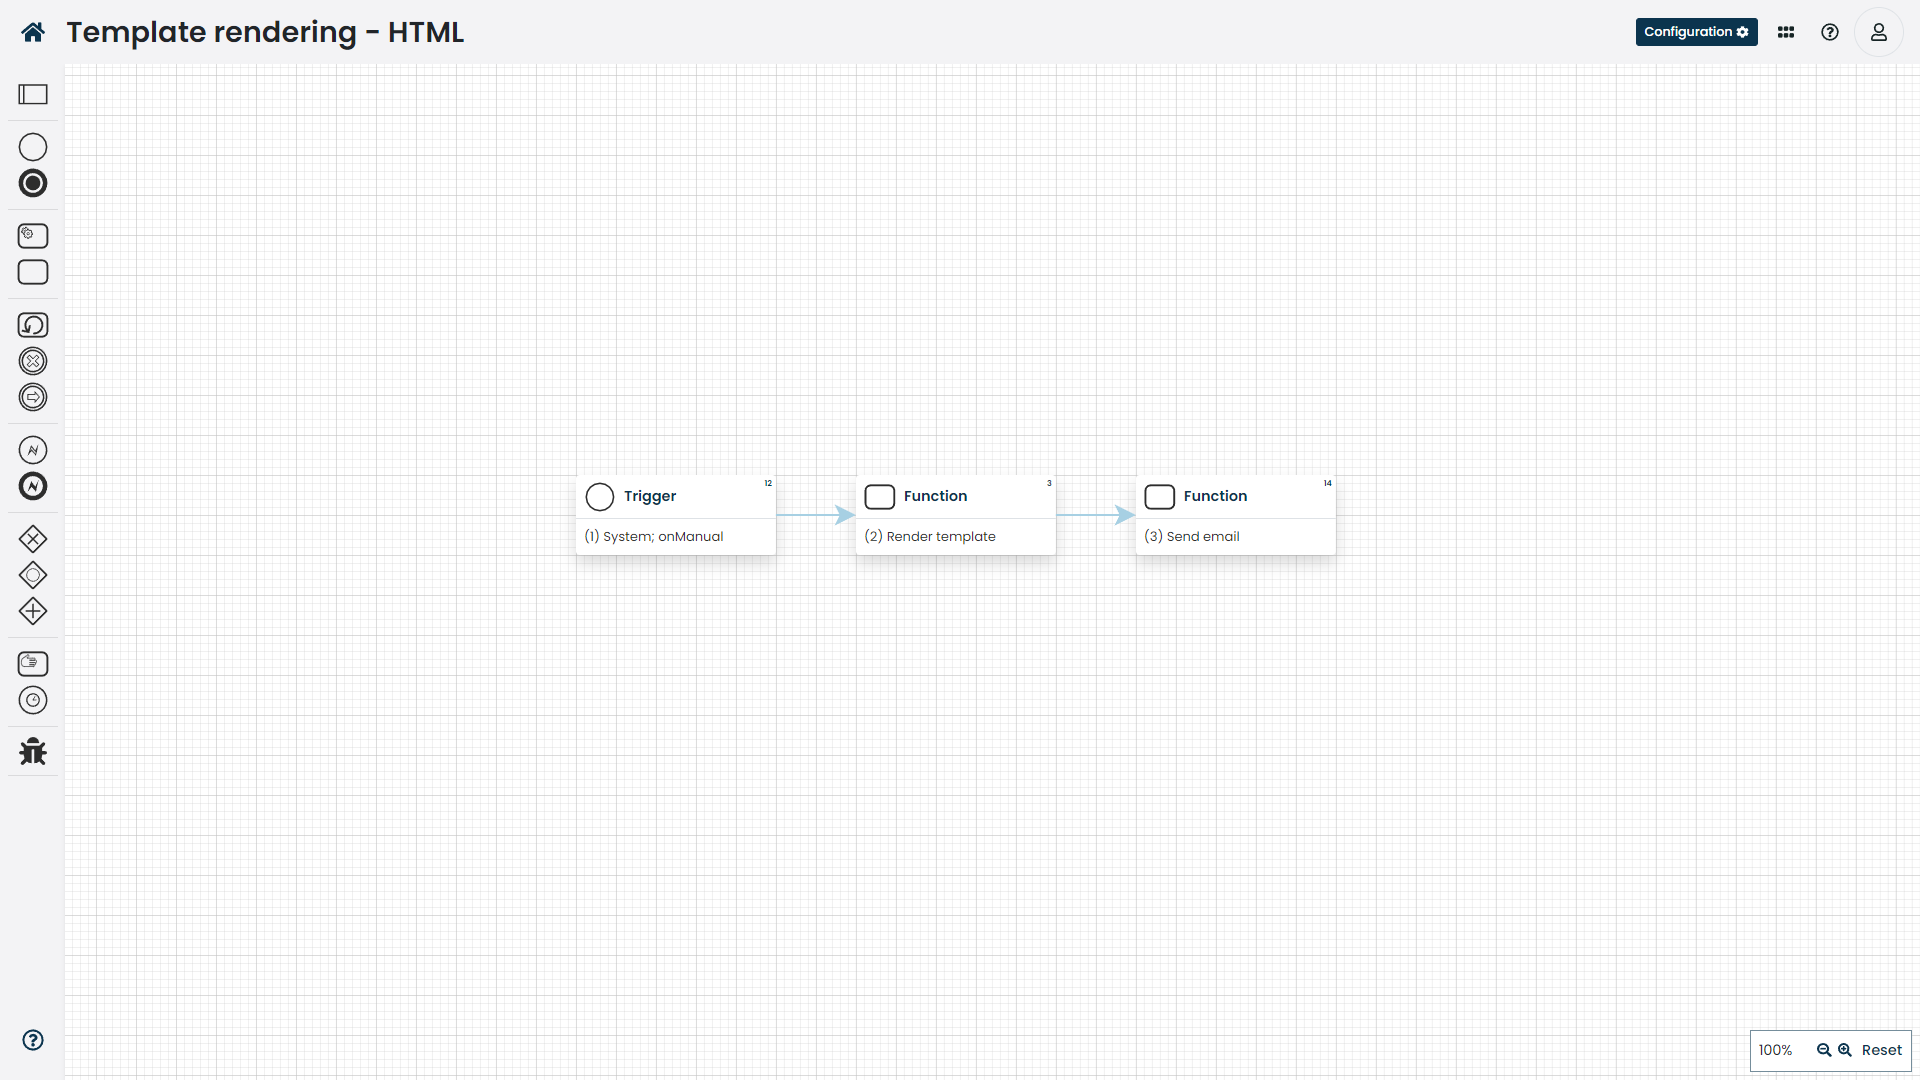
The source code for the workflow can be found here.
|
Make sure that the |
Rendering a PDF template
The difference between HTML and PDF rendering is that the documentType parameter changes to application/pdf.
With PDFs you can also adjust the render options to modify how the final PDF is rendered.
|
In order to render templates as PDF documents, you need to setup PDF rendering. |

The source code for the workflow can be found here.
|
You can combine both types of templates to render dynamic emails with PDF attachments. The example for the workflow can be found here |
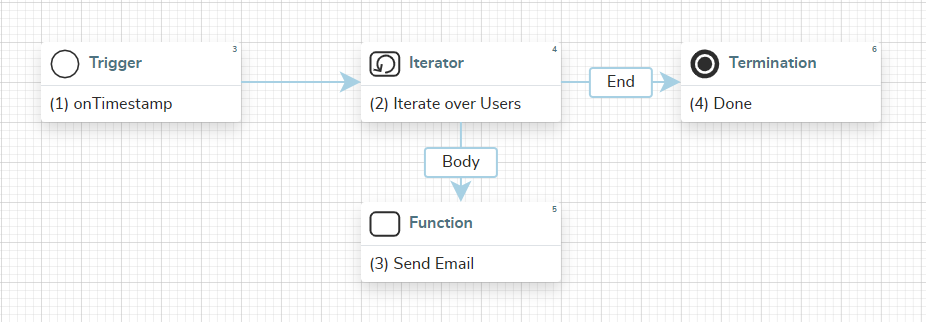
Timestamp
For this example, let’s assume we want to wish all users a Happy new year.
All the emails need to be sent out at exactly midnight.
For this, we use a trigger of type onTimestamp with the timestamp of 2021-01-01T00:00:00Z
Workfing with Records
The section outlines some tips and tricks you can use when working with records.
Checking for existence
In case where you wish to perform some task depending on the existence of records, you can use either of the following approaches.
Both approaches are valid and there is no benefit between using one or the other. Decide based on your preferences/context.
Approach A
When searching for records, tick the incTotal option and assign the total result value to a variable.
Inside the gateway, check if the total value is greater then 0.

You can find the source code for the workflow here.
Approach B
Inside the gateway, check if the count(items) value is greater then 0.

You can find the source code for the workflow here.
Create or update
When creating the record you need to call the compose record create function, and when updating the record, you need to call the compose record update function.
|
Only the highlighted portion performs the create/update check; the rest is boilerplate to get it to the desired state. |
If you need to call one or the other on-the-fyly, you can use the following approach.
You can use the record.recordID != "0" to determine if the record needs to be updated — the default recordID value is "0".

You can find the source code for the workflow here.
Removing the value
To remove some record value, use an expression step to set the value in question to an empty Any.

You can find the source code for the workflow here.
Handling missing values
To use the default value in case the record value does not exist, you need to use the ?? operator.
To exemplify, using a ?? b will return a if it exists or b if it does not.
|
The below example uses a variable as the default value.
You can use a constant such as |

You can find the source code for the workflow here.
Parallelism
This section provides some examples on how you should perform tasks in parallel.
Unconditional parallelism
Unconditional parallelism should be used when two or more branches of execution should be done in parallel regardless of the state.
To achieve this, use the fork gateway  where each outbound branch defines one branch of parallel execution.
|
If any of the branches defines the termination step |


You can find the source code for the workflow here.
Unconditional parallel segment
A parallel segment is where the workflow transitions from sequential execution into parallel execution and back into sequential execution.
Unconditional parallelism should be used when two or more branches of execution should be done in parallel regardless of the state.
To achieve this, use the fork gateway where each outbound branch defines one branch of parallel execution.
Terminate the parallel segment by using the join gateway .
|
If any of the branches defines the termination step |

You can find the source code for the workflow here.
Conditional parallelism
conditional parallelism should be used when two or more branches of execution should be done in parallel regardless of the state.
To achieve this, use the fork gateway where each outbound branch defines one branch of parallel execution.
|
If any of the branches defines the termination step |

You can find the source code for the workflow here.
Conditional parallel segment
A parallel segment is where the workflow transitions from sequential execution into parallel execution and back into sequential execution.
conditional parallelism should be used when two or more branches of execution should be done in parallel regardless of the state.
To achieve this, use the fork gateway where each outbound branch defines one branch of parallel execution.
Terminate the parallel segment by using the join gateway .
|
If any of the branches defines the termination step |

You can find the source code for the workflow here.
Dynamic Configuration
When defining automation which needs to interact with external systems or you need to make the workflow execution configurable, static workflows may prove challenging to use.
You can define a settings module where you can define all of the configurable parameters your automation requires.
This can be anything from URL addresses to login credentials and access tokens.
|
When storing access tokens and other credentials, make sure to properly configure access control. |

settings module.Inside your workflow, simply fetch the record from the settings module and configure your execution using it’s values.

settings module.You can find the source code for the workflow here.
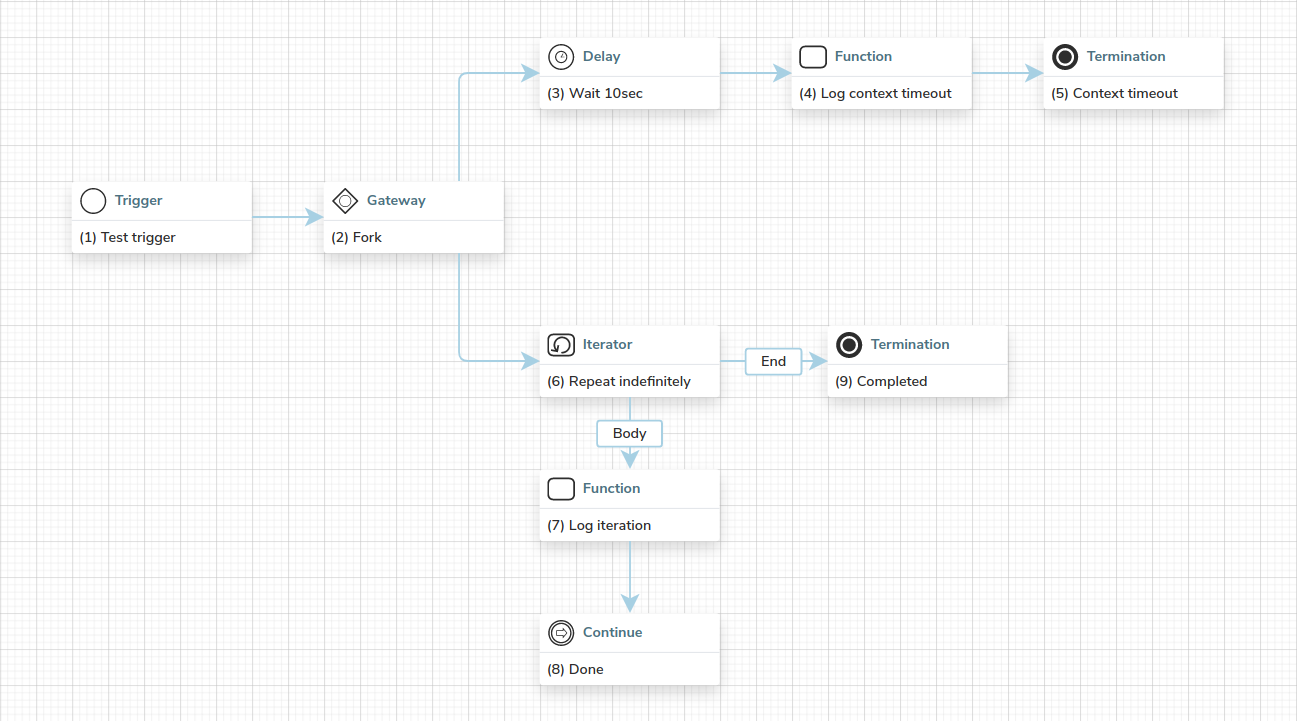
Execution timeout
Corteza workflows' execution does not timeout by default (the workflow can run indefinitely).
If your use-case requires you to define a timeout, you can implement this manually.
-
Schedule a timeout after 10sec of execution,
-
repeat the iterator indefinitely.
Messagebus Queue
Messagebus queue mechanism complements the workflows in a way that any asynchronous computation can be offloaded to another workflow or workflow-extendable process. More info on the described topics can be found at Workflows, Integration Gateway Route Profiler and the Messagebus subsystem.
-
create a queue
-
create an endpoint
-
write to queue via workflow
-
read from queue via workflow
-
send a payload to an endpoint
-
-
view endpoint payload in profiler
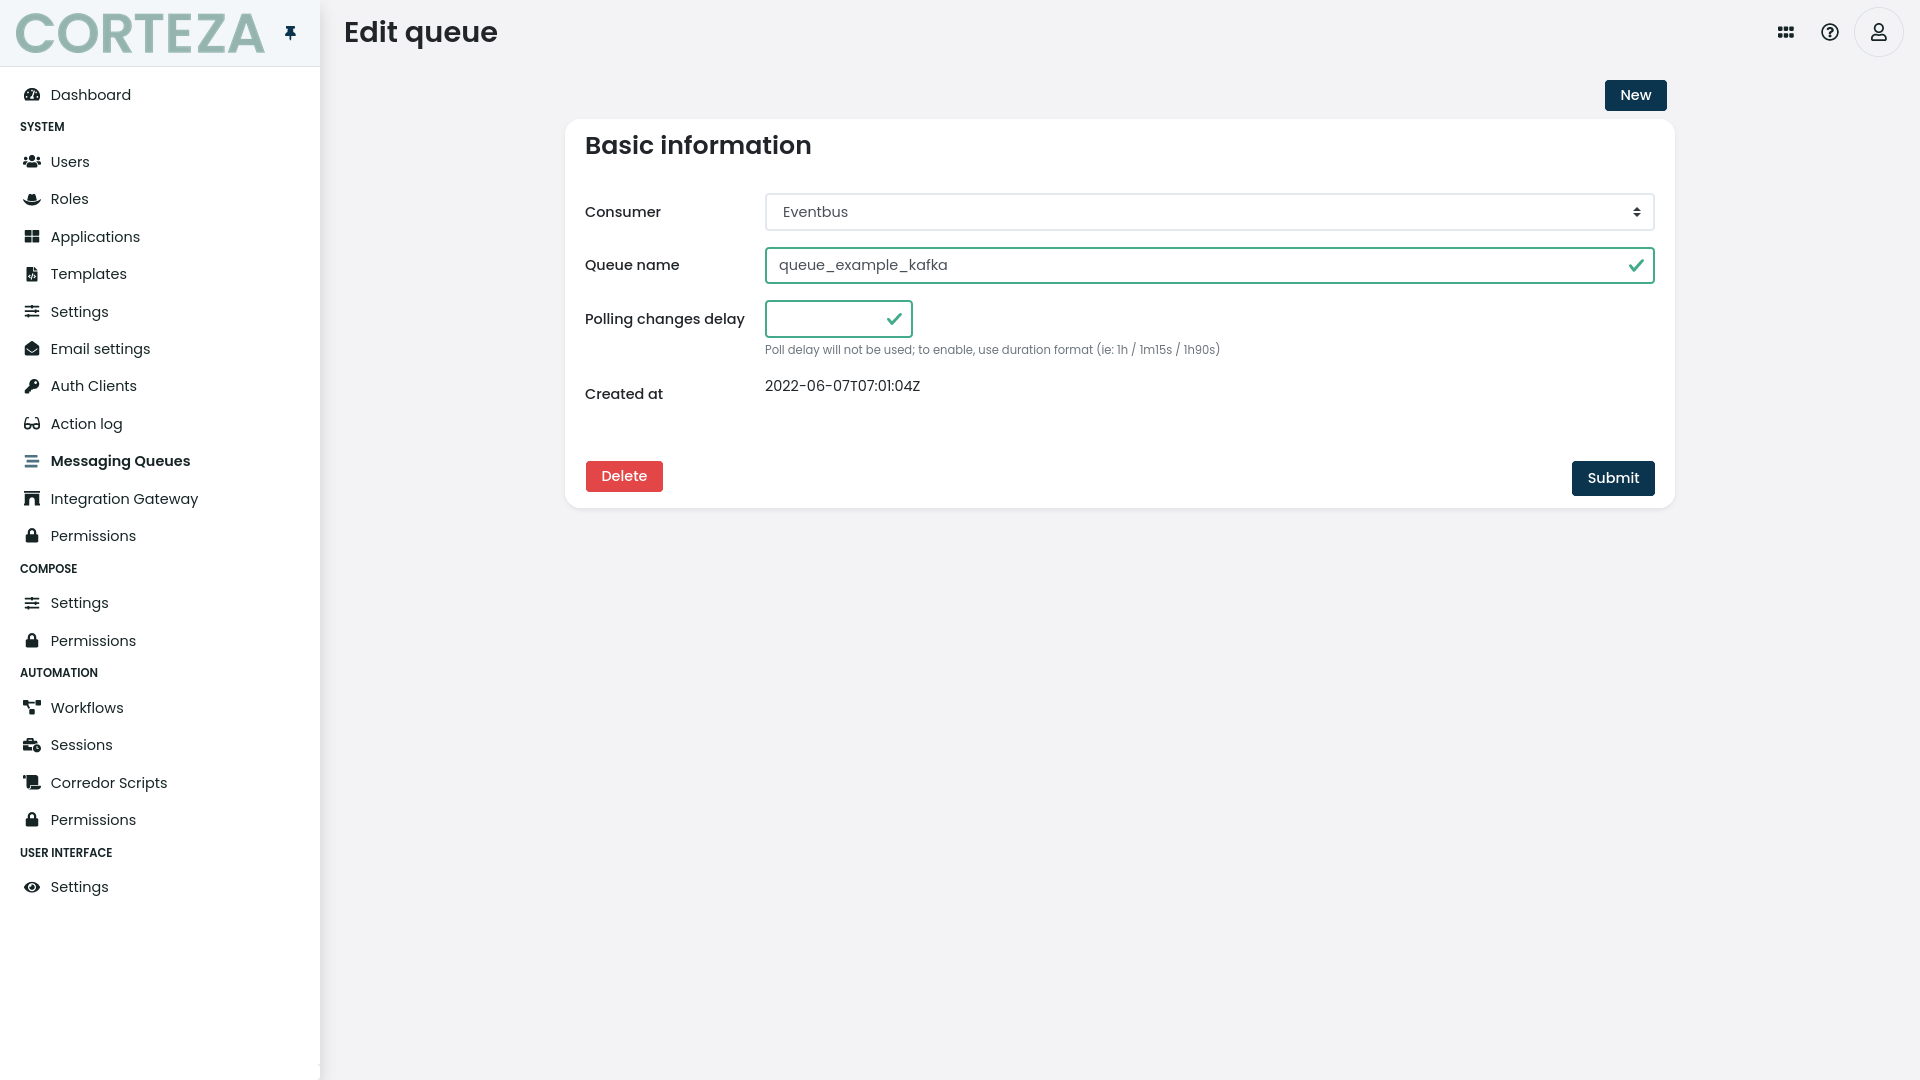
Create a new Queue
|
The |
Write to Queue
This is a workflow we will use just to manually trigger the write to queue.
|
You can either use any of the automation buttons to trigger this workflow from the UI. Usually the case would be after creating a record and then sending the new recordID to the queue. |
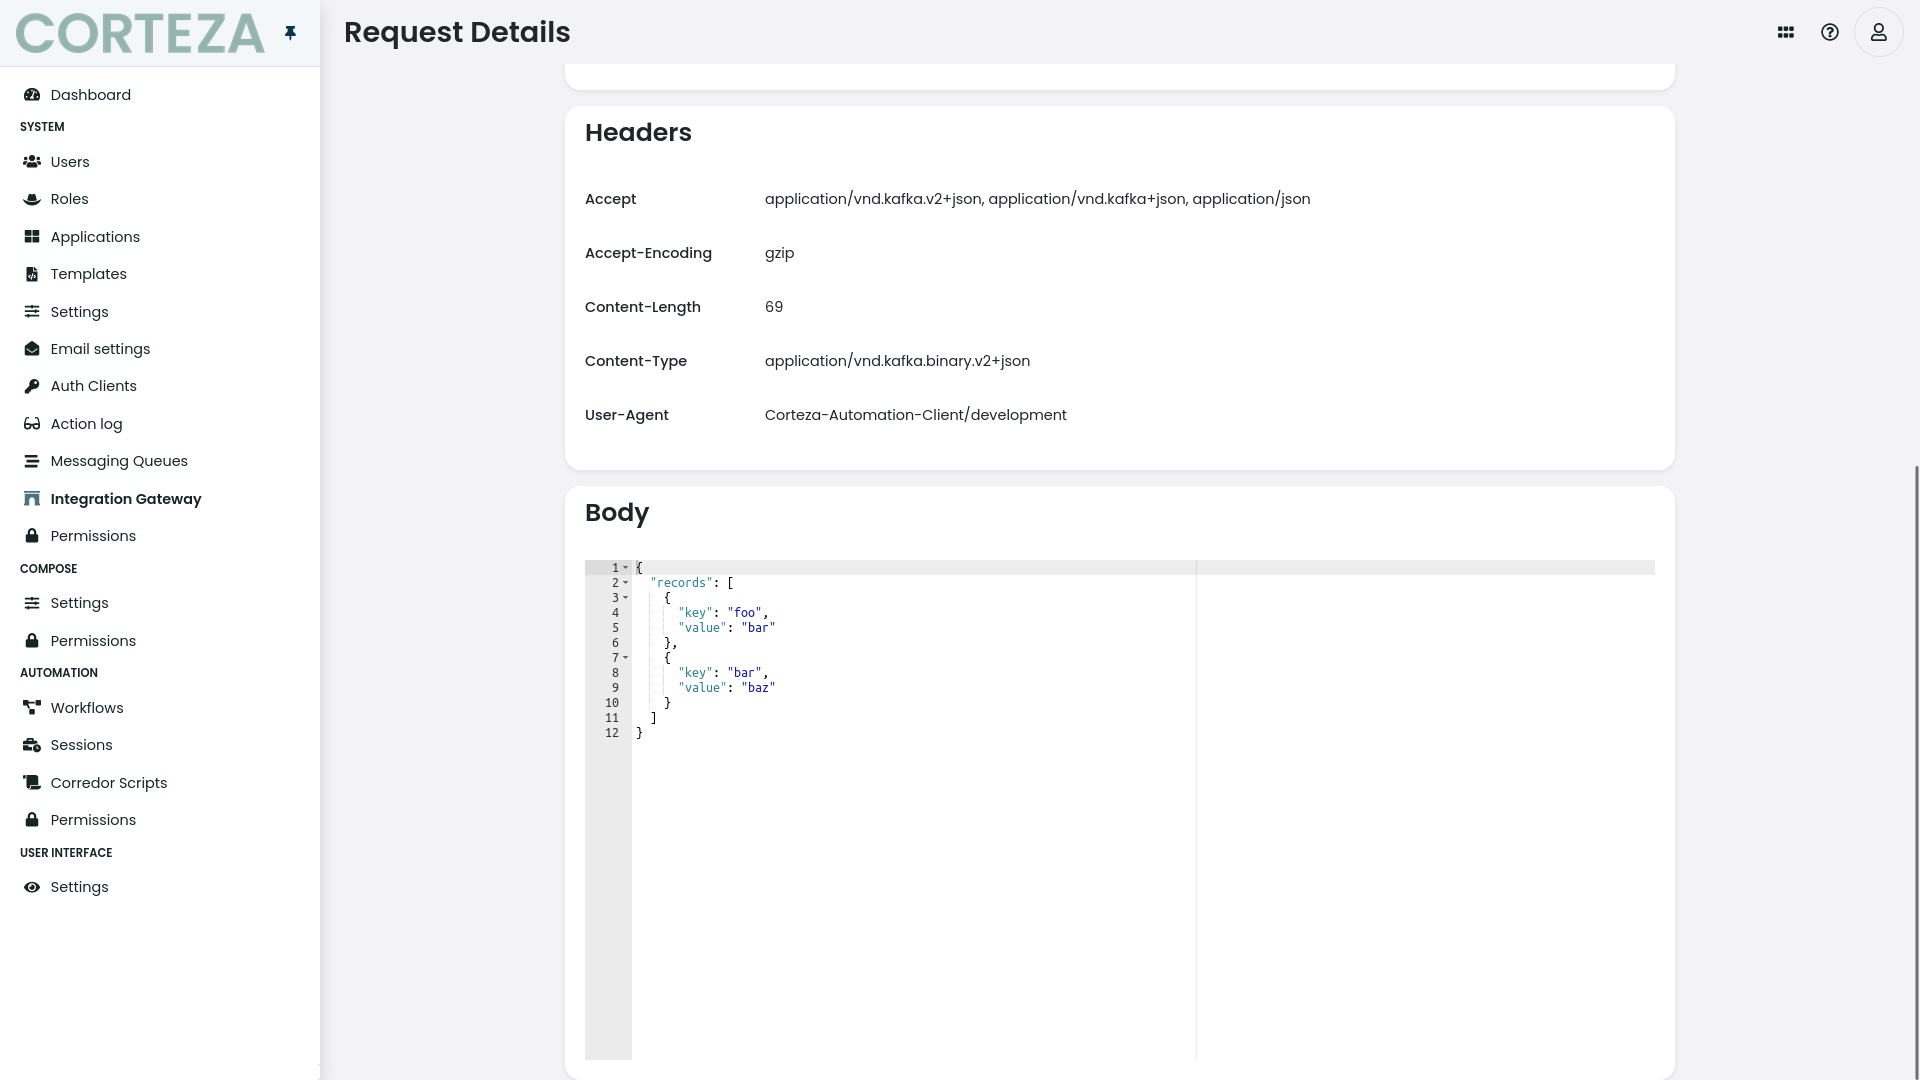
The payload is defined as an Array that is then stringified
toJSON([
  {"key":"foo", "value": "bar"},
  {"key":"bar", "value": "baz"}
])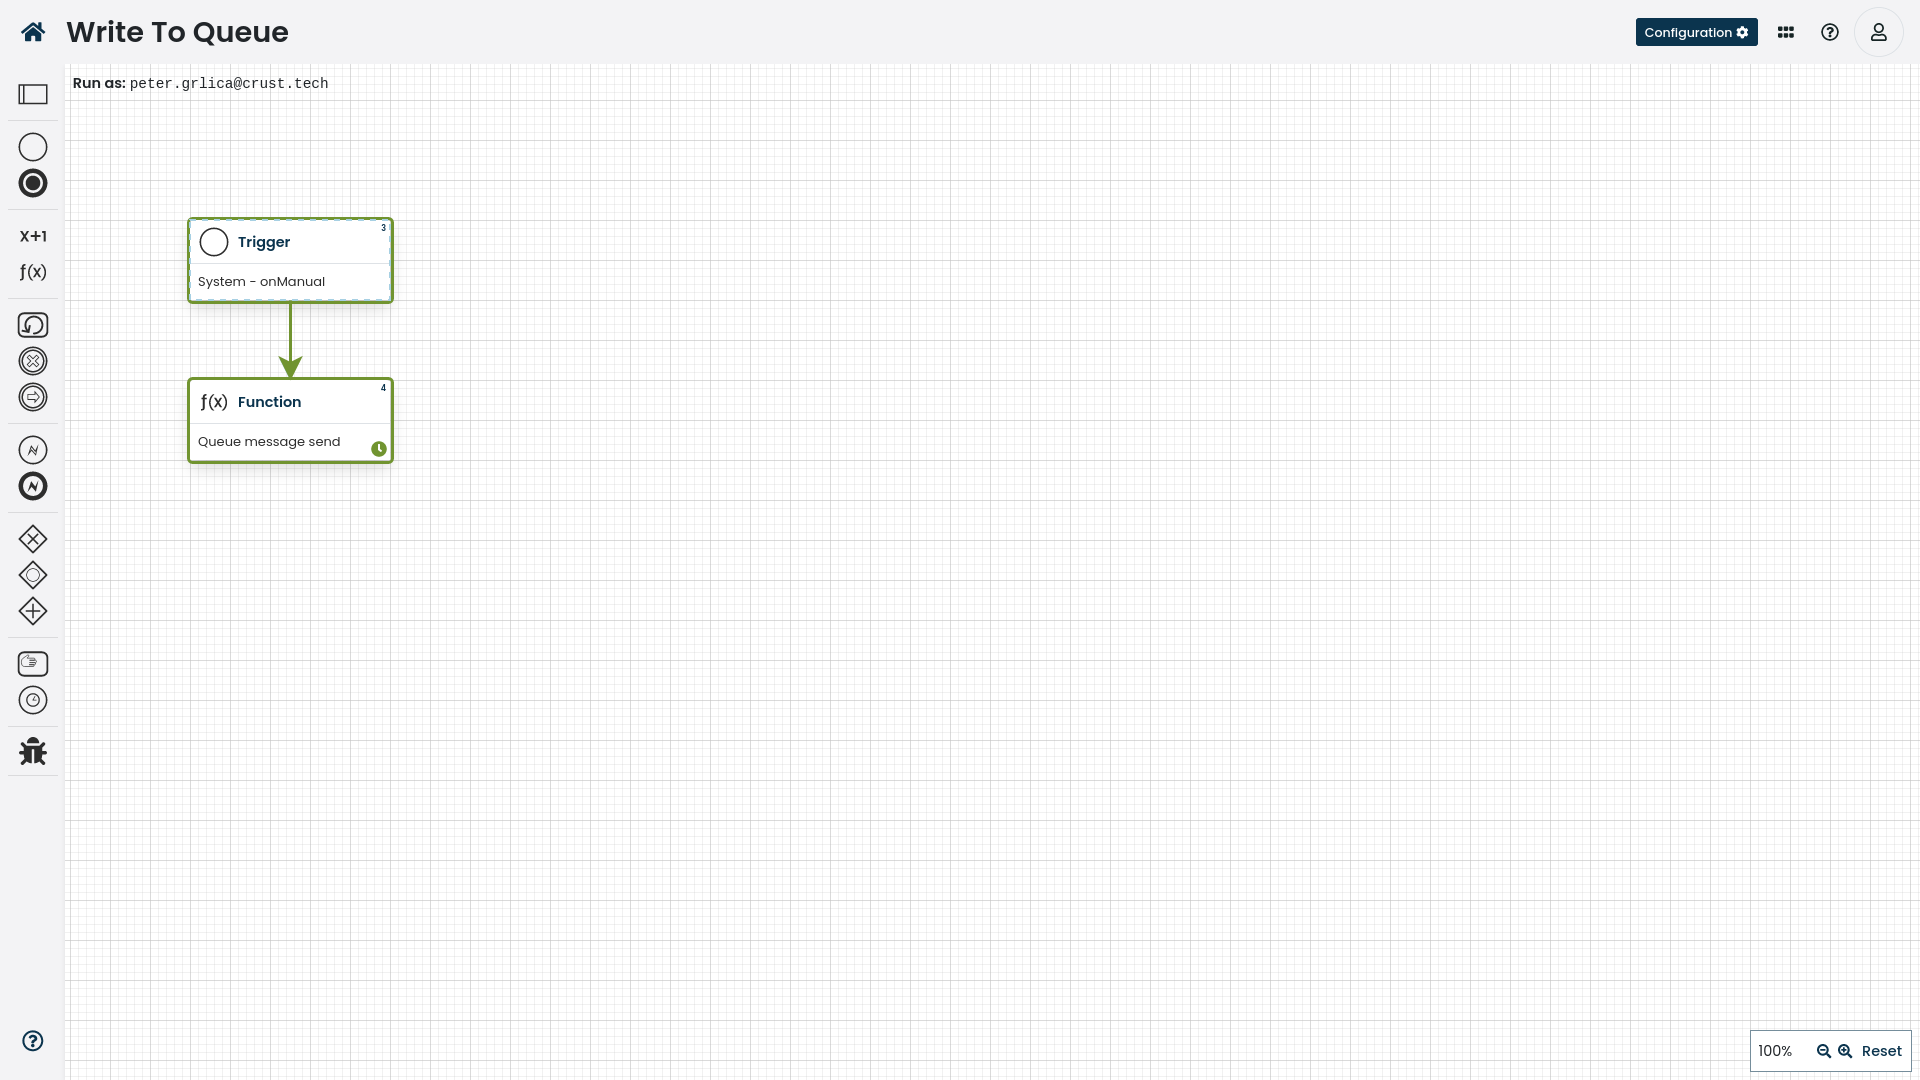
The source code for the workflow example.
Read from Queue
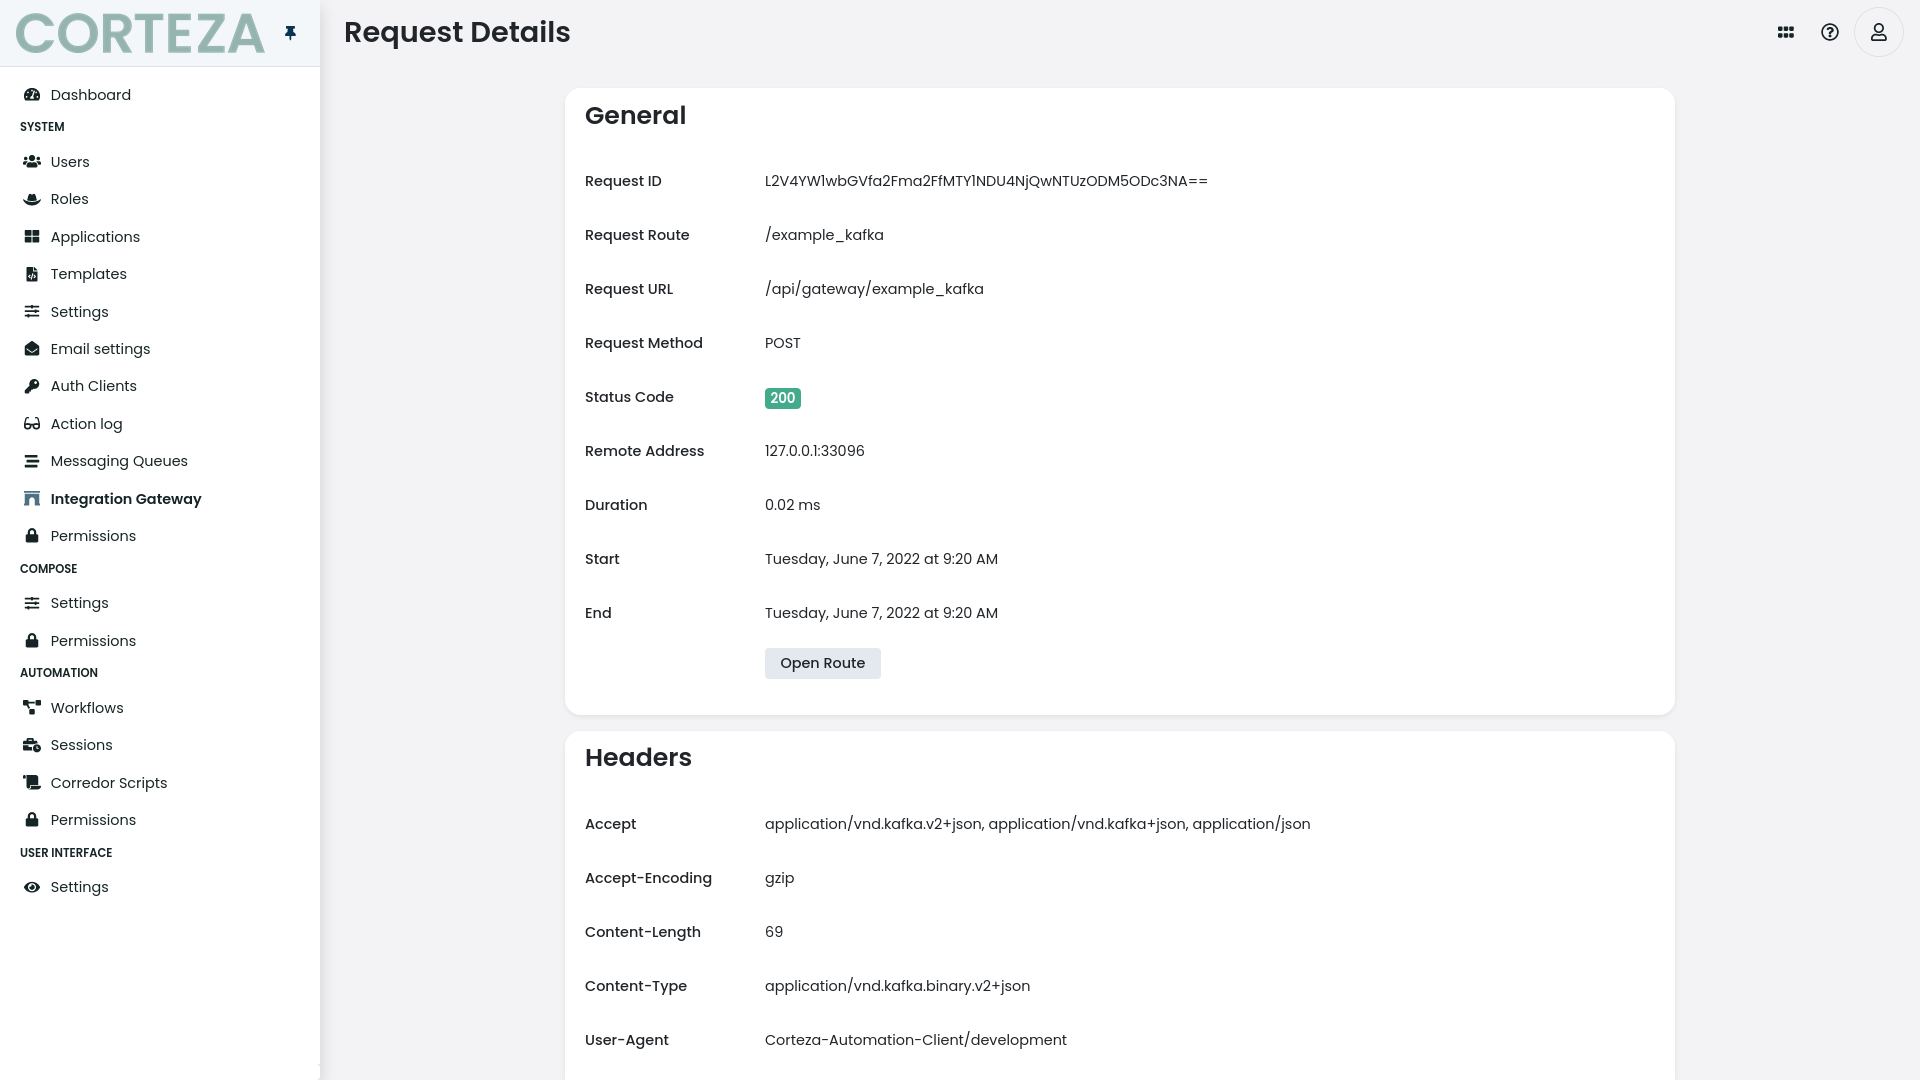
Here we parse the queue payload and create a custom HTTP request to an outside, ie. Kafka (in our example an endpoint we will create for this purpose only).
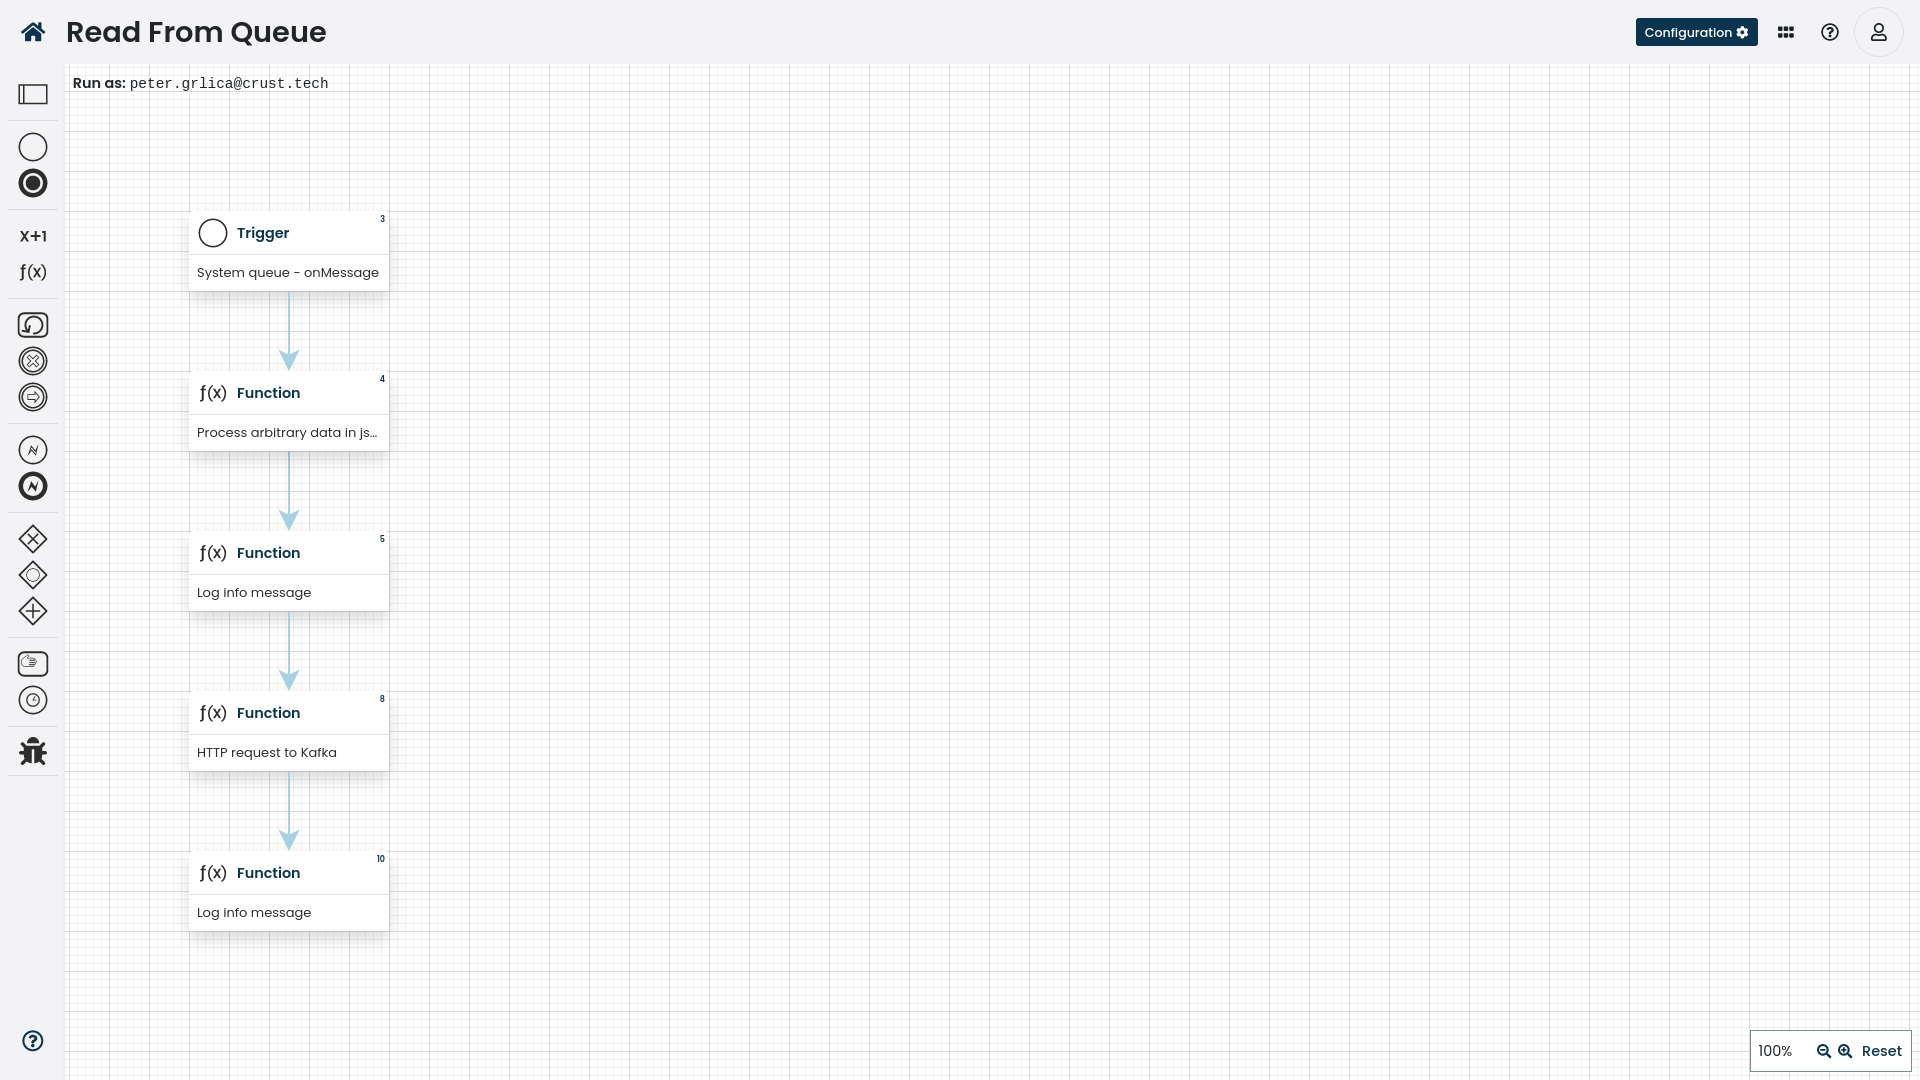
The source code for the workflow example.
Create a mock service endpoint
What we need now is to trigger the Queue Write workflow and a request will be sent to our local server on the /api/gateway/example_kafka endpoint.
The resulting request can be seen on the Integration Gateway profiler (if you have it enabled, see more at Route Profiler).