Low Code configuration
Corteza provides a powerful Low-Code development platform allowing you to setup your application with ease. Corteza Low Code allows you to extend Corteza and support your business needs.
With Corteza Low Code we define the logical data structure, how the data is displayed, and how it should be visualized. The second part is the automation process, which allows you to implement custom business logic and automate tasks.
If you wish to learn more about a specific topic, refer to the subsections under .
App configuration
Create a new namespace
A namespace is a container for the configuration and the data specific to an application, such as a CRM. A namespace uses modules to define the data structure, pages to define how the data is displayed, and charts to visualize the data.
|
A namespace can not directly access data from another namespace. If this is needed, consider implementing this using automation to programmatically define the interaction. |
To create a new namespace, navigate to your Corteza instance (for example http://latest.cortezaproject.org/) and click on the Low Code application.

A new screen with a list of all namespaces will appear.
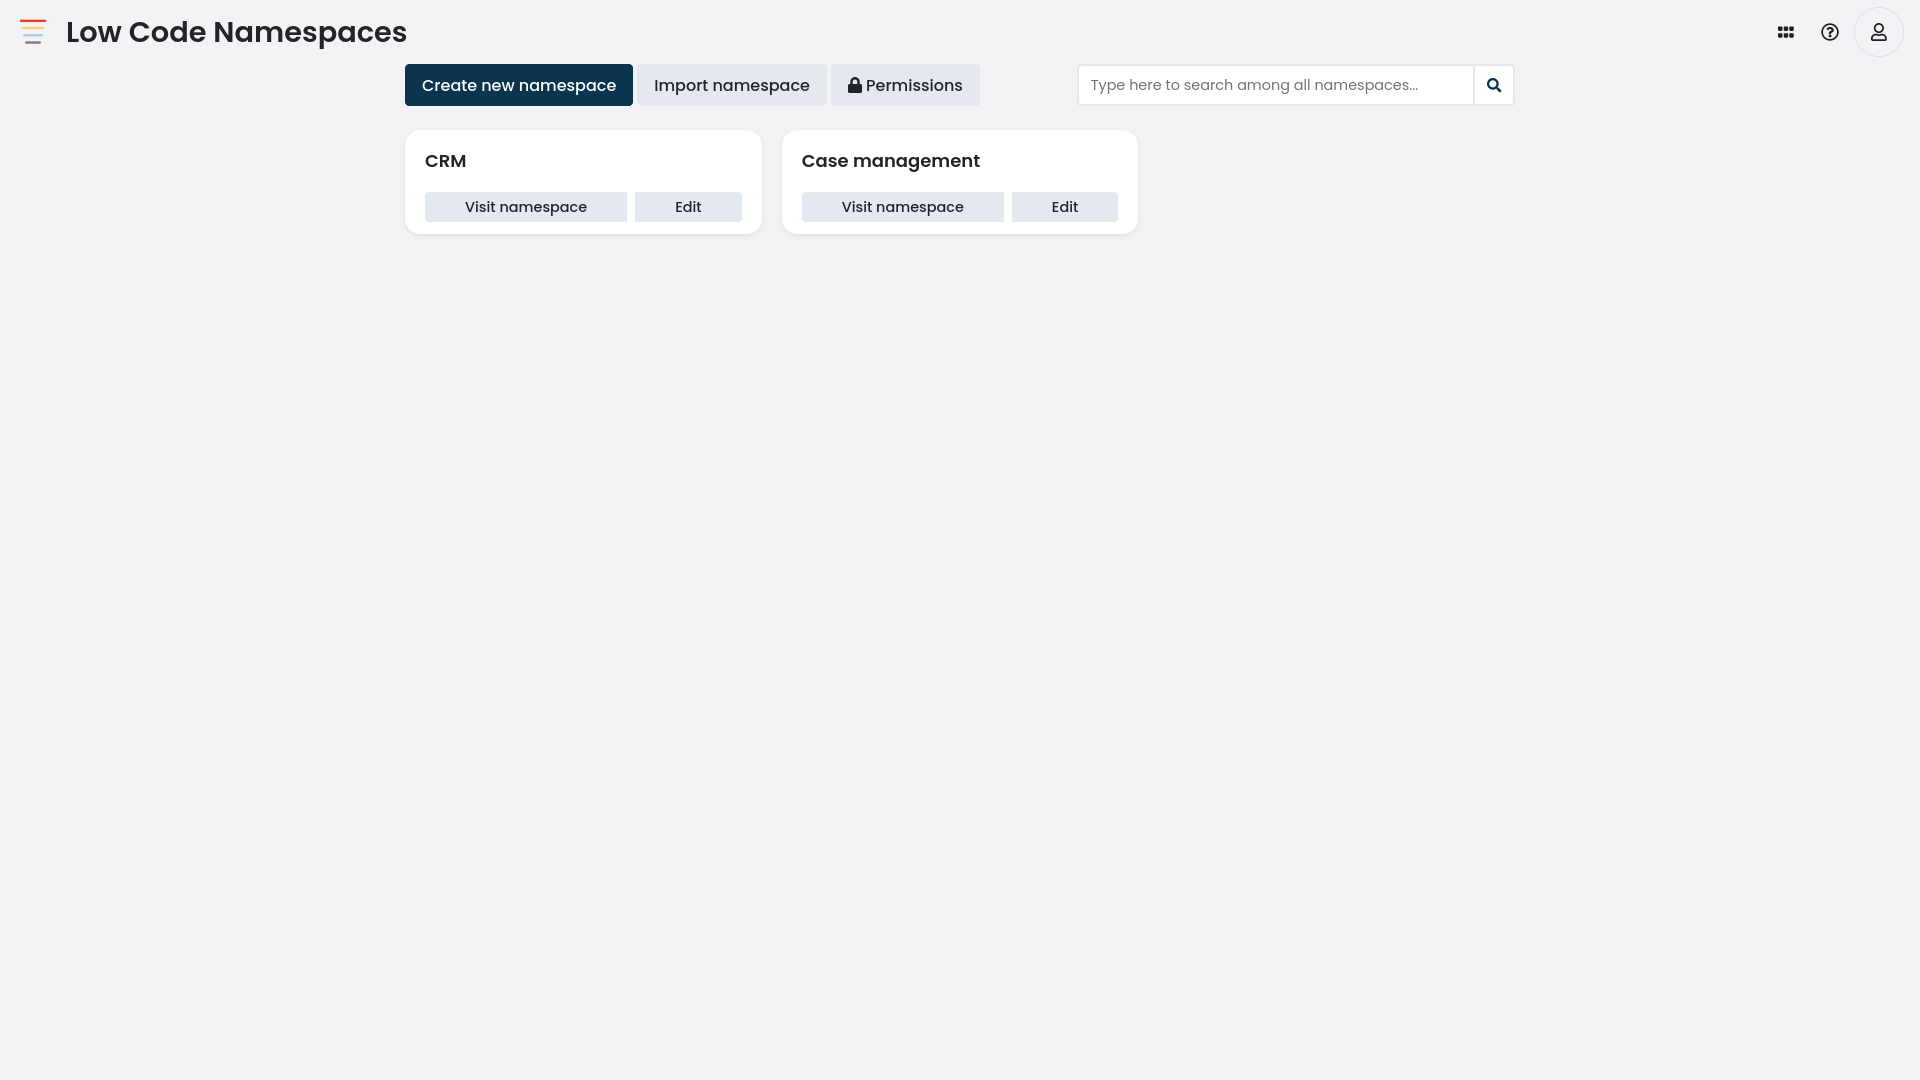
-
create a new namespace by clicking on the Create new namespace button,
-
edit existing namespaces by clicking on the Edit icon next to the namespace,
-
manage global permissions by clicking on the Permissions button
Click on the Create new namespace button, insert the required parameters, and click on the Save or the Save and close button in the bottom right corner.
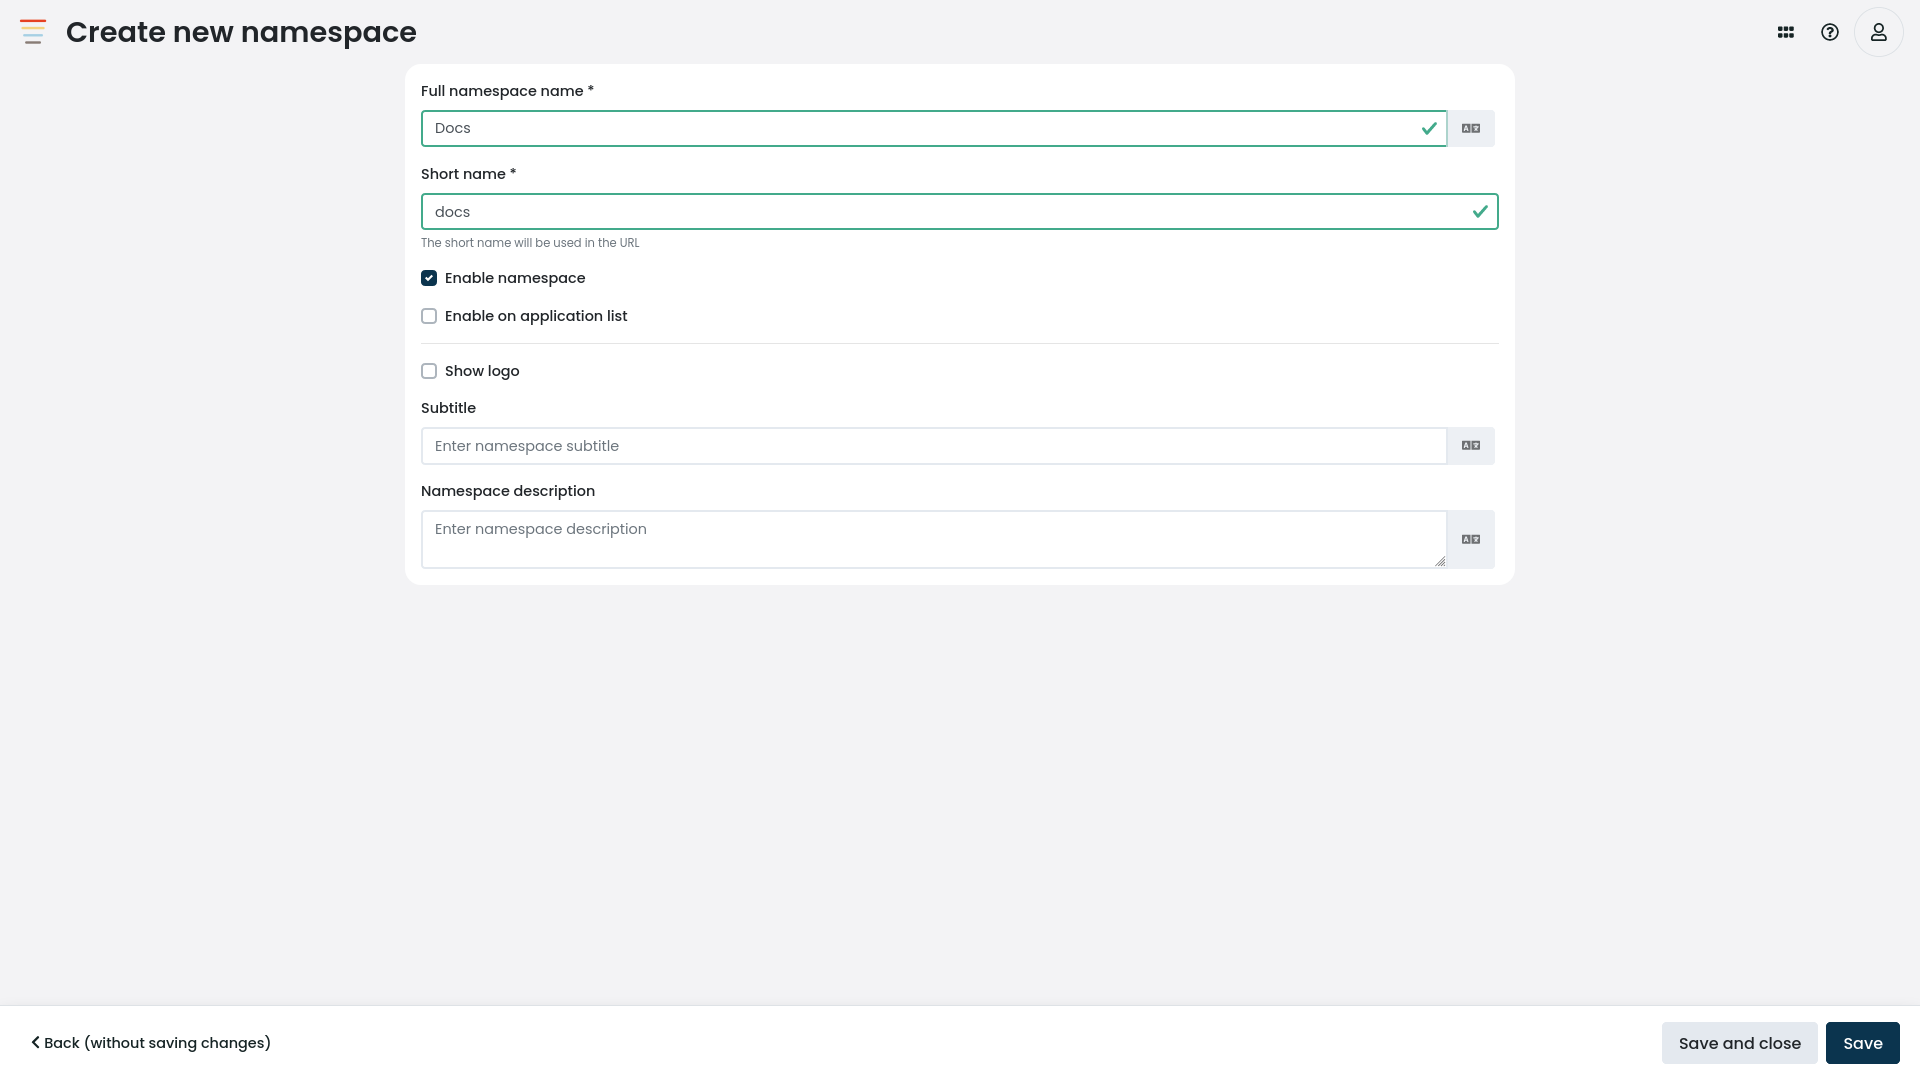
The namespace name is the human-friendly label that is shown when identifying the namespace. The name should be short and descriptive. |
|
The short name (slug) is a unique human-friendly system identifier for the namespace that can be used instead of the namespace ID when referencing the namespace. The short name is usually a variation of the full name that must conform to the following constraints:
|
|
The enabled flag controls if the namespace is enabled and can be accessed. When disabled, the namespace is still visible, but can not be accessed. |
|
The enabled application flag controls if the namespace should be immediately treated as an application and shown on the app selector. |
|
The namespace logo input allows you to upload a custom logo for the specific namespace. The default logo is the one defined in the theme. |
|
The namespace icon input allows you to upload a custom icon to use alongside the namespace. |
|
The subtitle is the subtitle of the namespace |
|
The description allows you to provide a more verbose description of the namespace, what it is for, and what kind of data does it contain. |
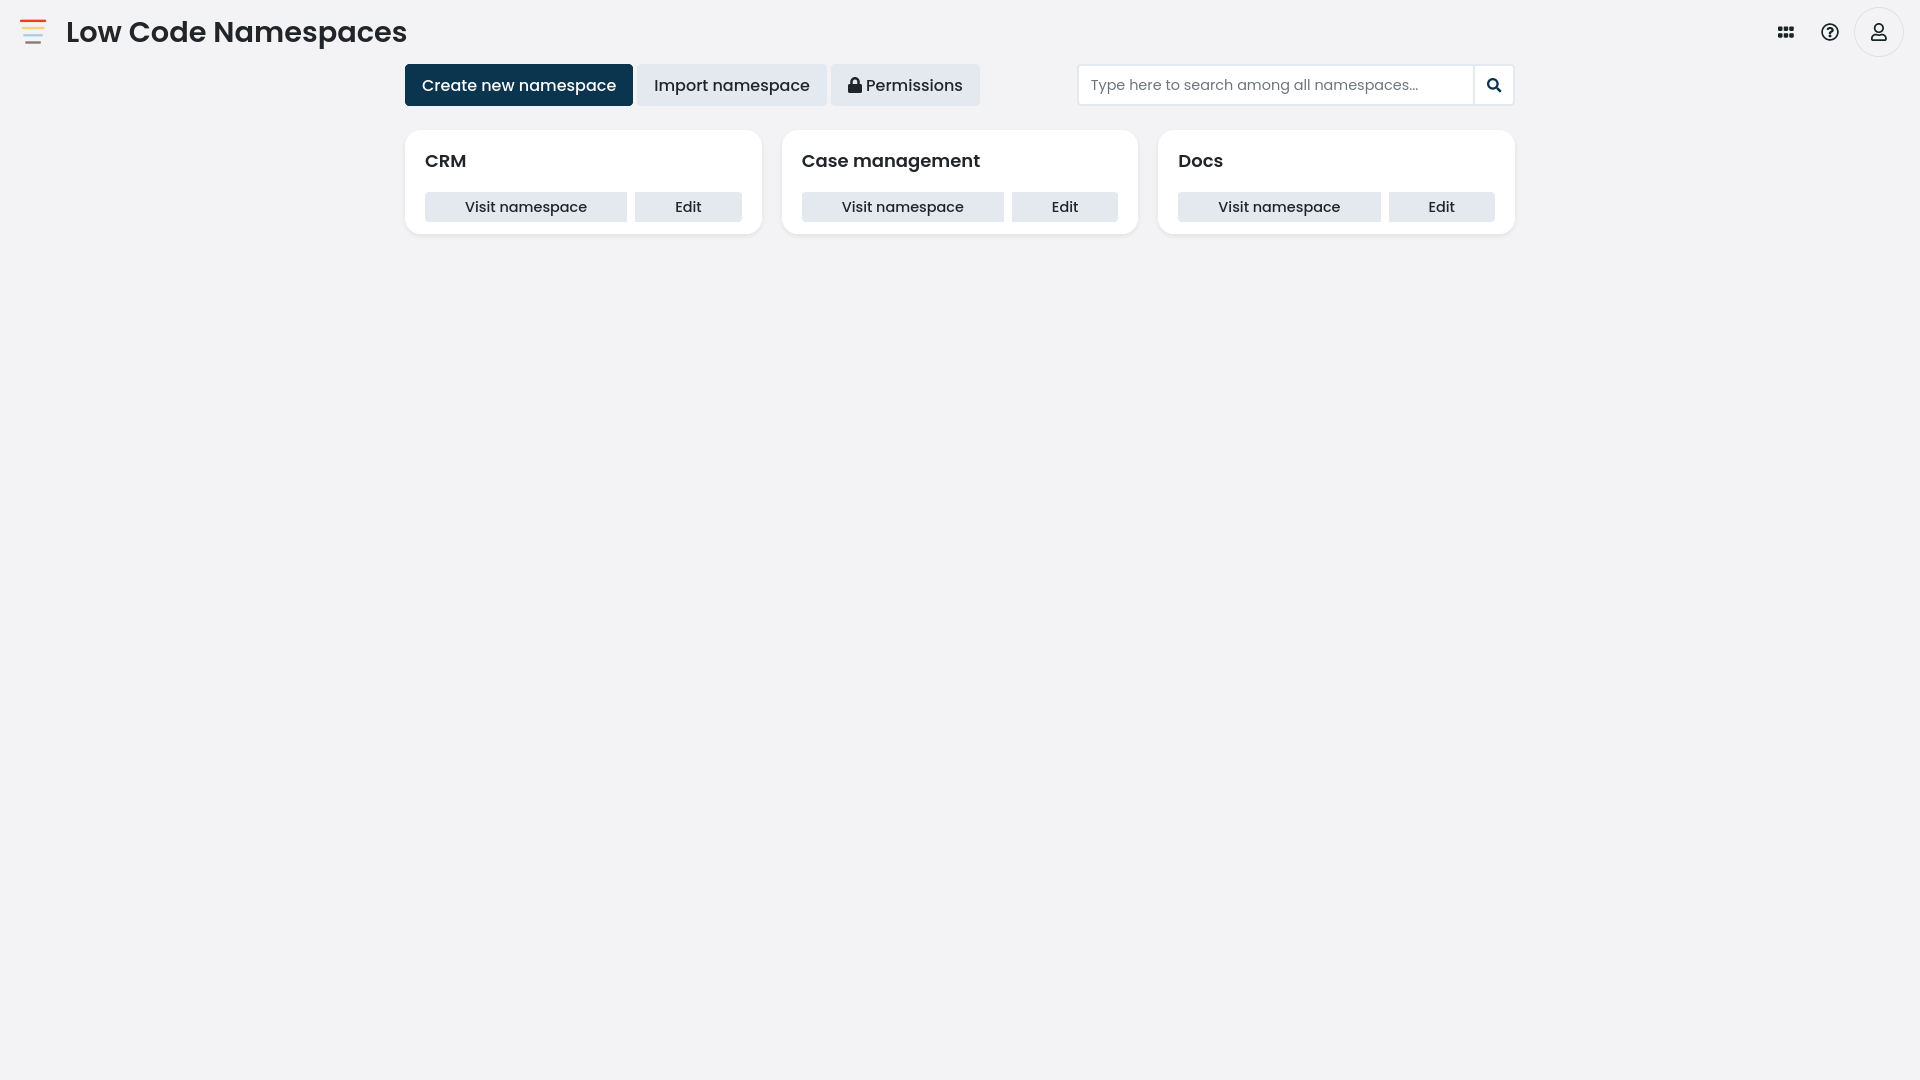
After you’ve created the namespace, you can access it by clicking on the Visit namespace button. At this point, your namespace is empty and doesn’t have any modules, charts, or pages.
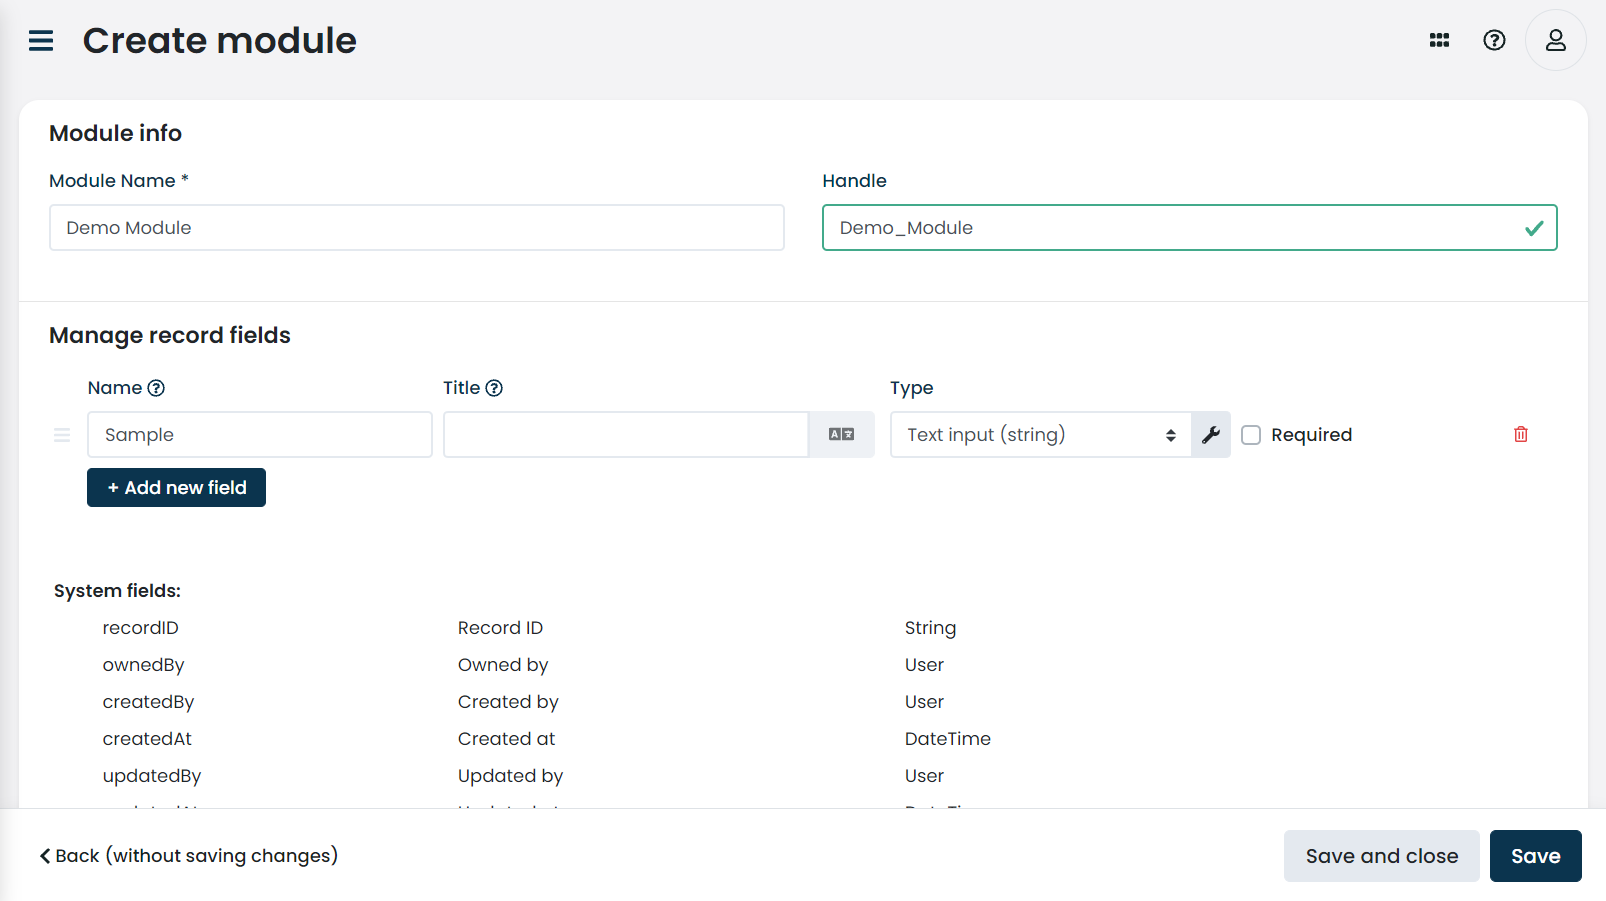
Creating a new module
A module defines the shape of a record and provides a container for the records, such as an account or a contact. A module uses a series for module fields to define the records' structure and a record page to define how the record is presented to the user.
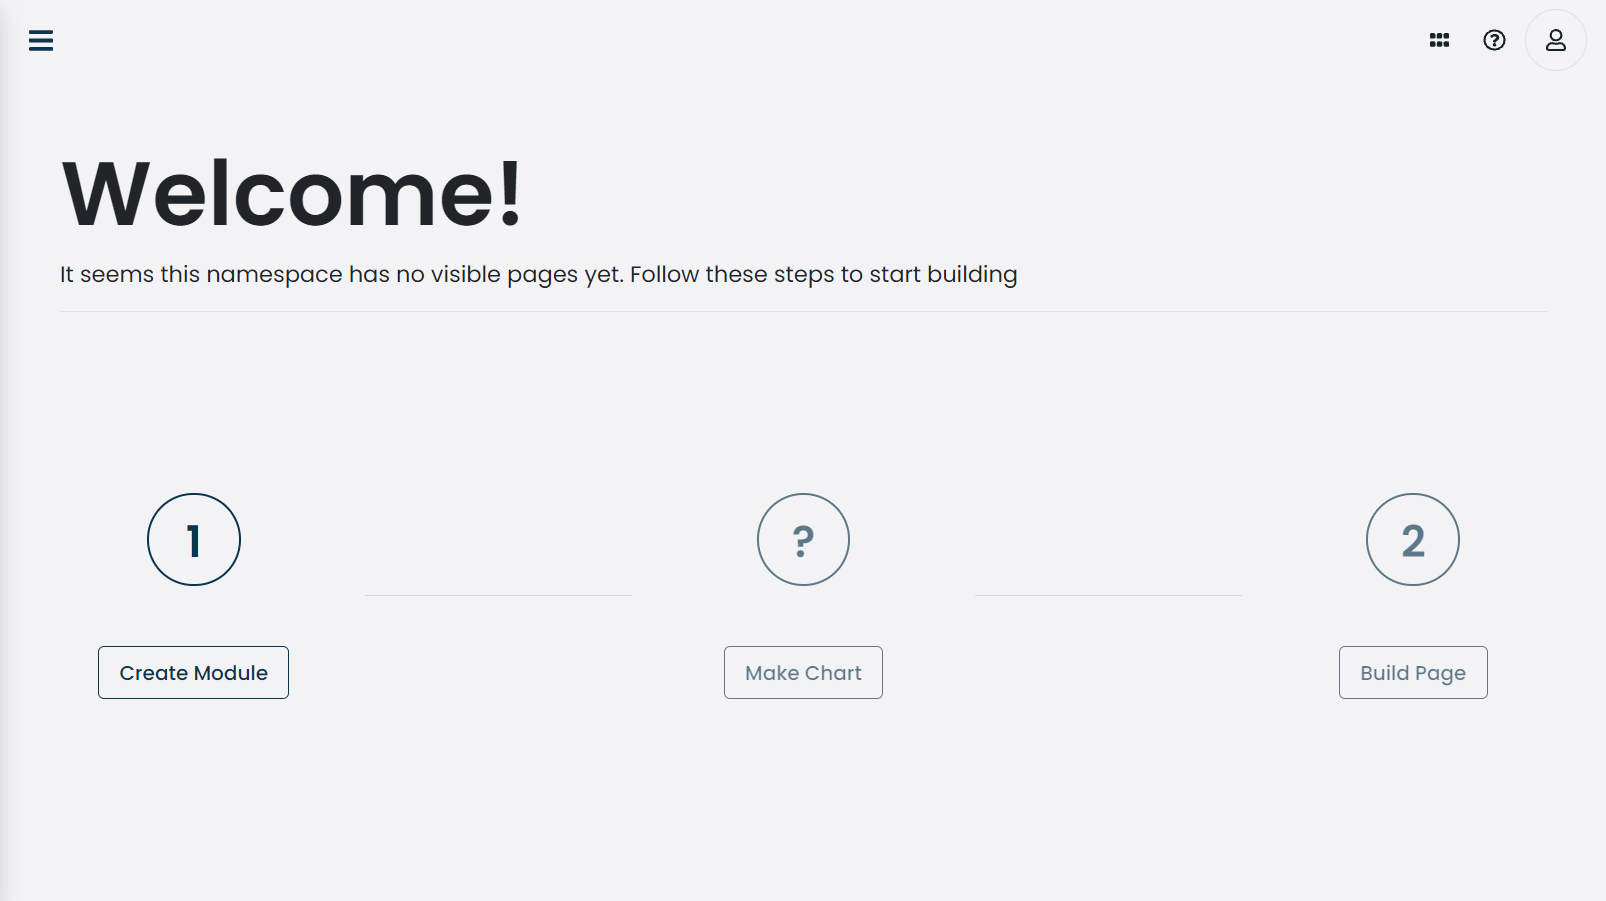
When configuring a new namespace, you are presented with an onboarding screen from where you can click on the Create Module button to create your first module.
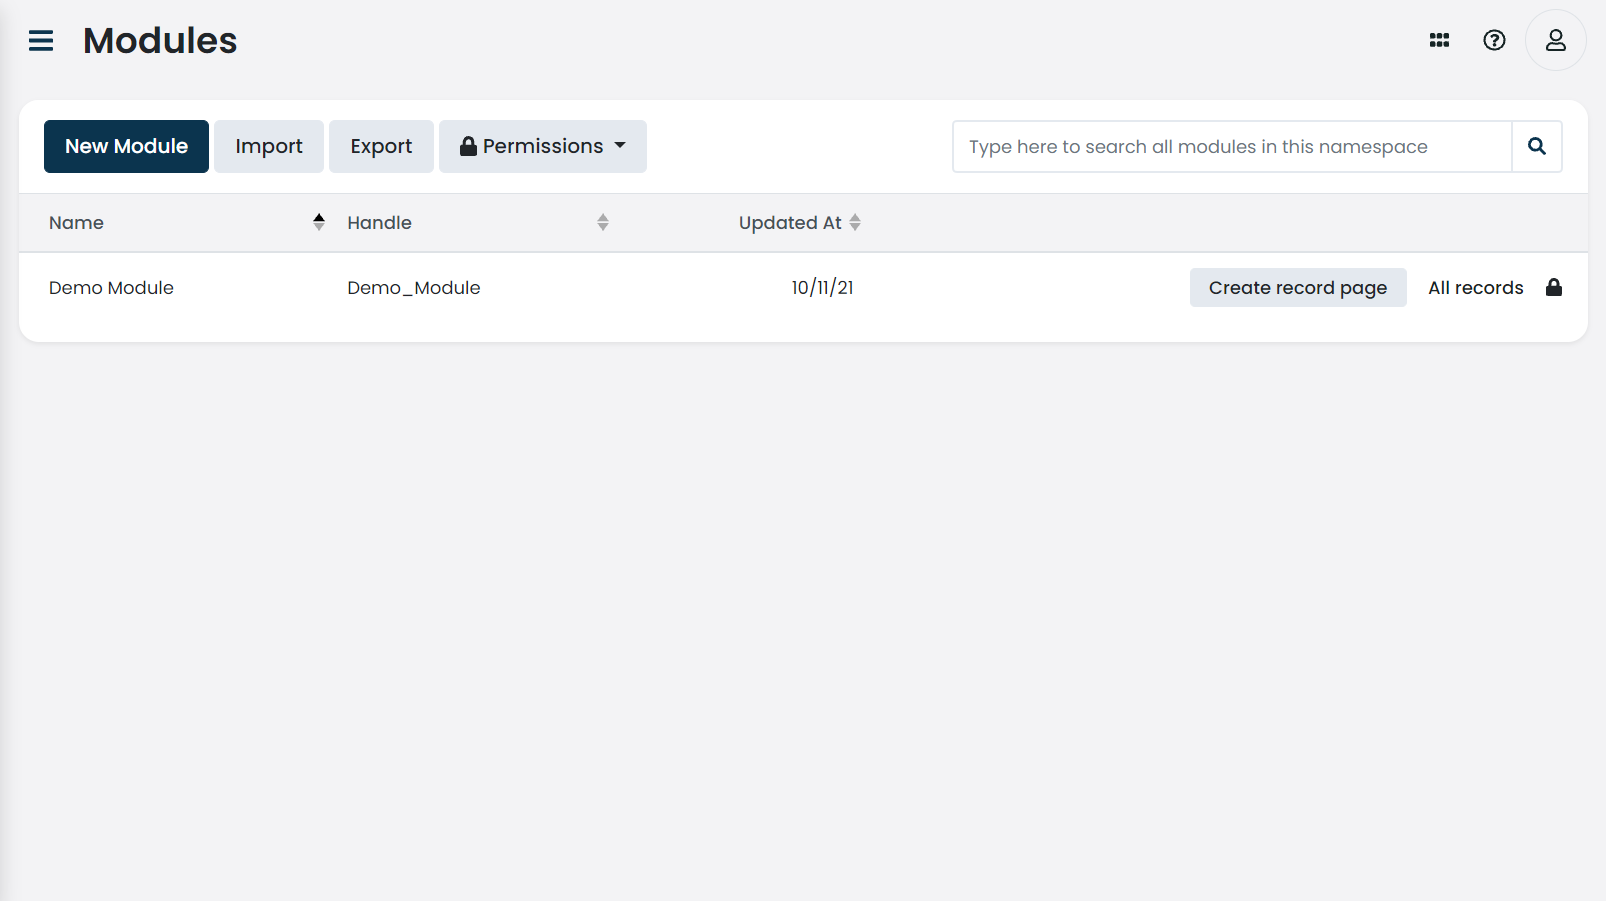
If you wish to add additional modules, or are configuring an already existing namespace, navigate to , and click on the New Module button.

-
Edit the module metadata,
-
edit module fields for the given module,
-
manage permissions for the given module by clicking on the Permissions button,
-
manage module field permissions for the given module by clicking on the Field permissions button.
The module name is a user-friendly label that is shown when identifying the module. The name should be short and descriptive. |
|
The short name (handle) is a unique user-friendly system identifier that can be used instead of the module ID when referencing the module. The handle is usually a variation of the full name and therefore must conform to the following constraints:
|
Creating record pages
A record page defines how the data is presented to the user when viewing, creating and editing records for that module. A record page consists of a series of page blocks that are defined with the page builder.
A record page is tied to the specified module, and to the record it is pointing to.
This allows you to configure the page blocks to react to the currently viewed record for dynamic resource filtering.
|
In case your module does not define a record page, you are not able to create or update its records through the user interface. You are still able to view its records, create the records using inline record lists, the API, or an automation. |
The record page can be created directly from the module edit screen by clicking on the Create record page button or from the module list screen by clicking on the Create record page next to a module.
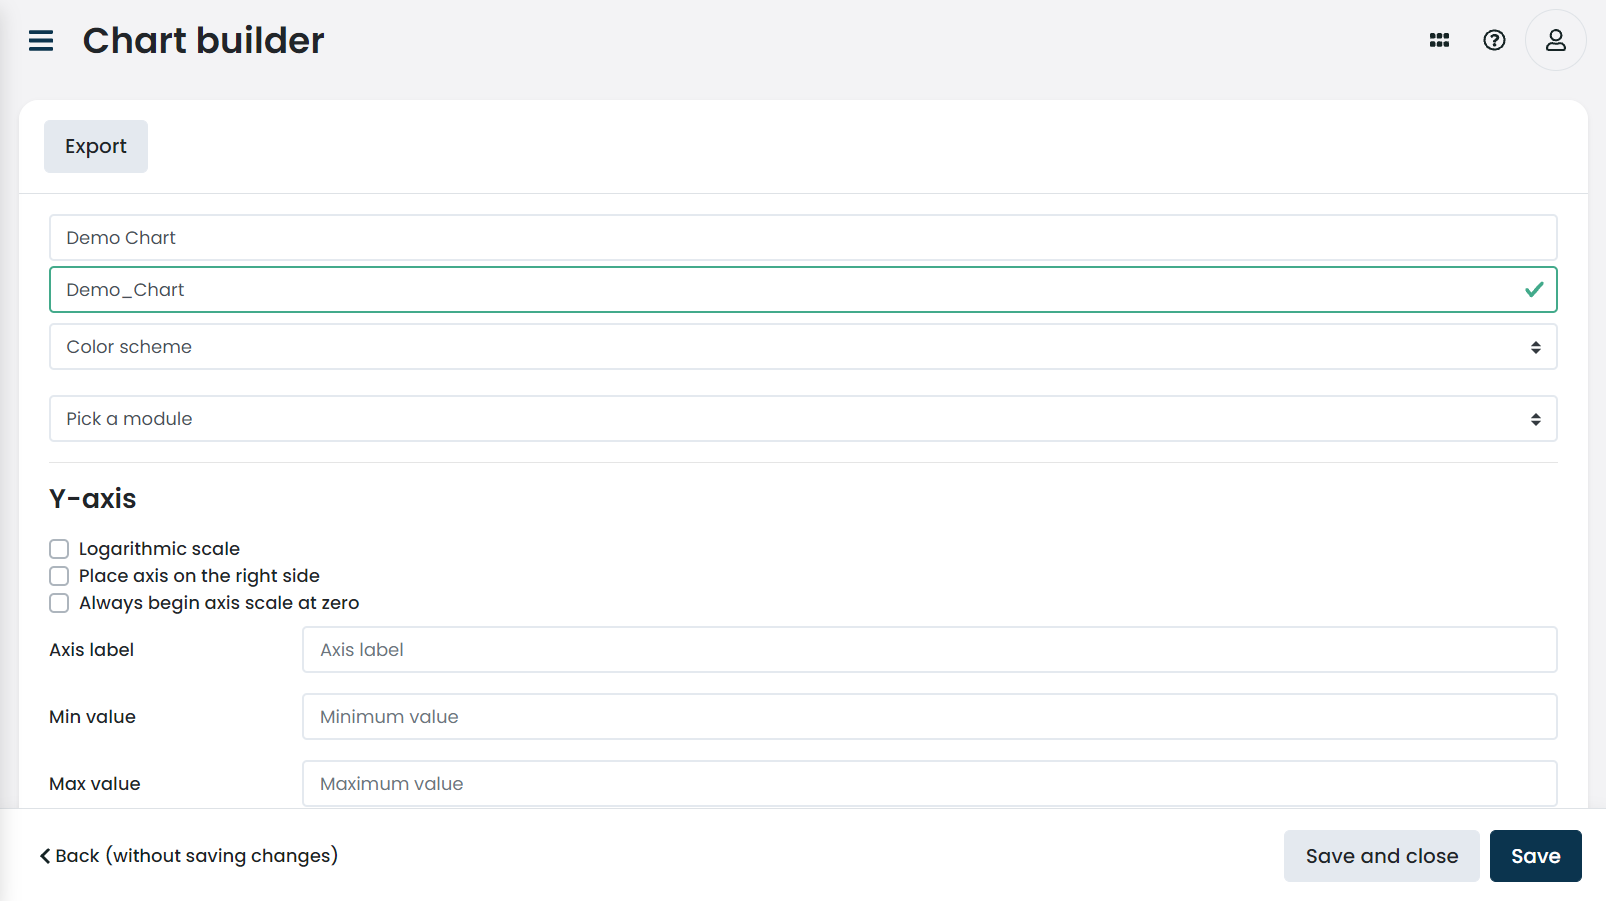
Creating charts
A chart defines how a specific modules' records are visualized. A chart is bound to your module and allows you to aggregate and transform the data which is then visualized on a chart.
|
One chart can only show records of one module. |
If you’re configuring a new namespace, you are presented with an onboarding screen from where you can click on the Create Chart button to create your first chart.
If you wish to add additional charts or are configuring an already configured namespace, navigate to , then click on the New Chart button.
-
Generic charts which include the usual line, bar, pie, and doughnut charts,
-
funnel charts which define the funnel chart,
-
gauge charts which define the gauge chart.
Refer to the chart specific sub-sections for more details
-
Edit the chart metadata,
-
edit the charts' report configuration,
-
edit the charts' visual representation.
Creating list pages
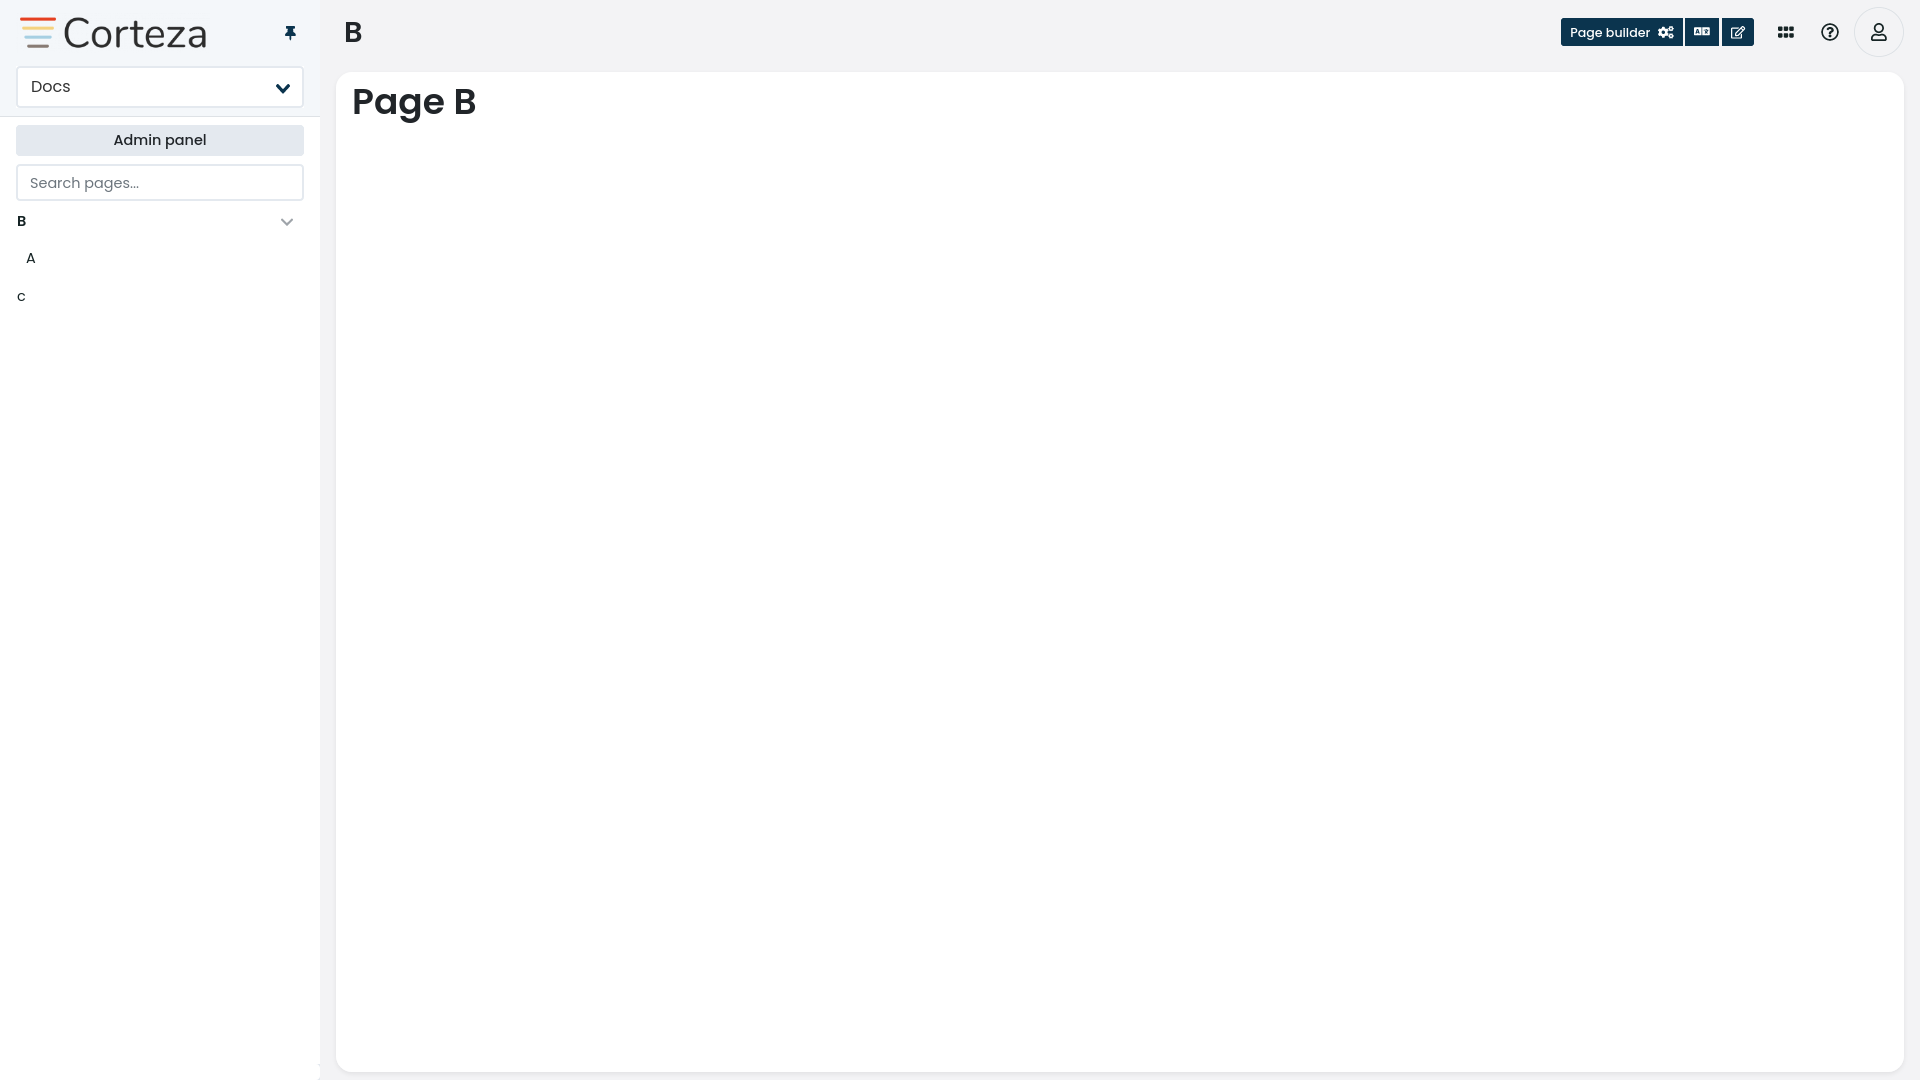
A list page defines how the application is presented to the user when interacting with it. A list page consists of a series of page blocks that are defined with the page builder.
In contrast to record pages, list pages are broader and only bound to the namespace they are on. They are general purpose and used to provide access to different record pages via record lists, dashboards, and other layouts.
When configuring a new namespace, you are presented with an onboarding screen. From there you click on the Build Page button in order to create your first page.
If you wish to add additional pages or you are configuring an already configured namespace, navigate to , and click on the New Page button. From there you can click on the Page builder button to enter the page builder
The page title is a label that is shown when viewing the page and when displaying the page navigation. The page title should be short and descriptive. |
|
The short name (handle) is a unique, user-friendly system identifier for the module. It can be used instead of the page ID when referencing the page. The handle is usually a variation of the title and therefore must conform to the following constraints:
|
Structuring the navigation
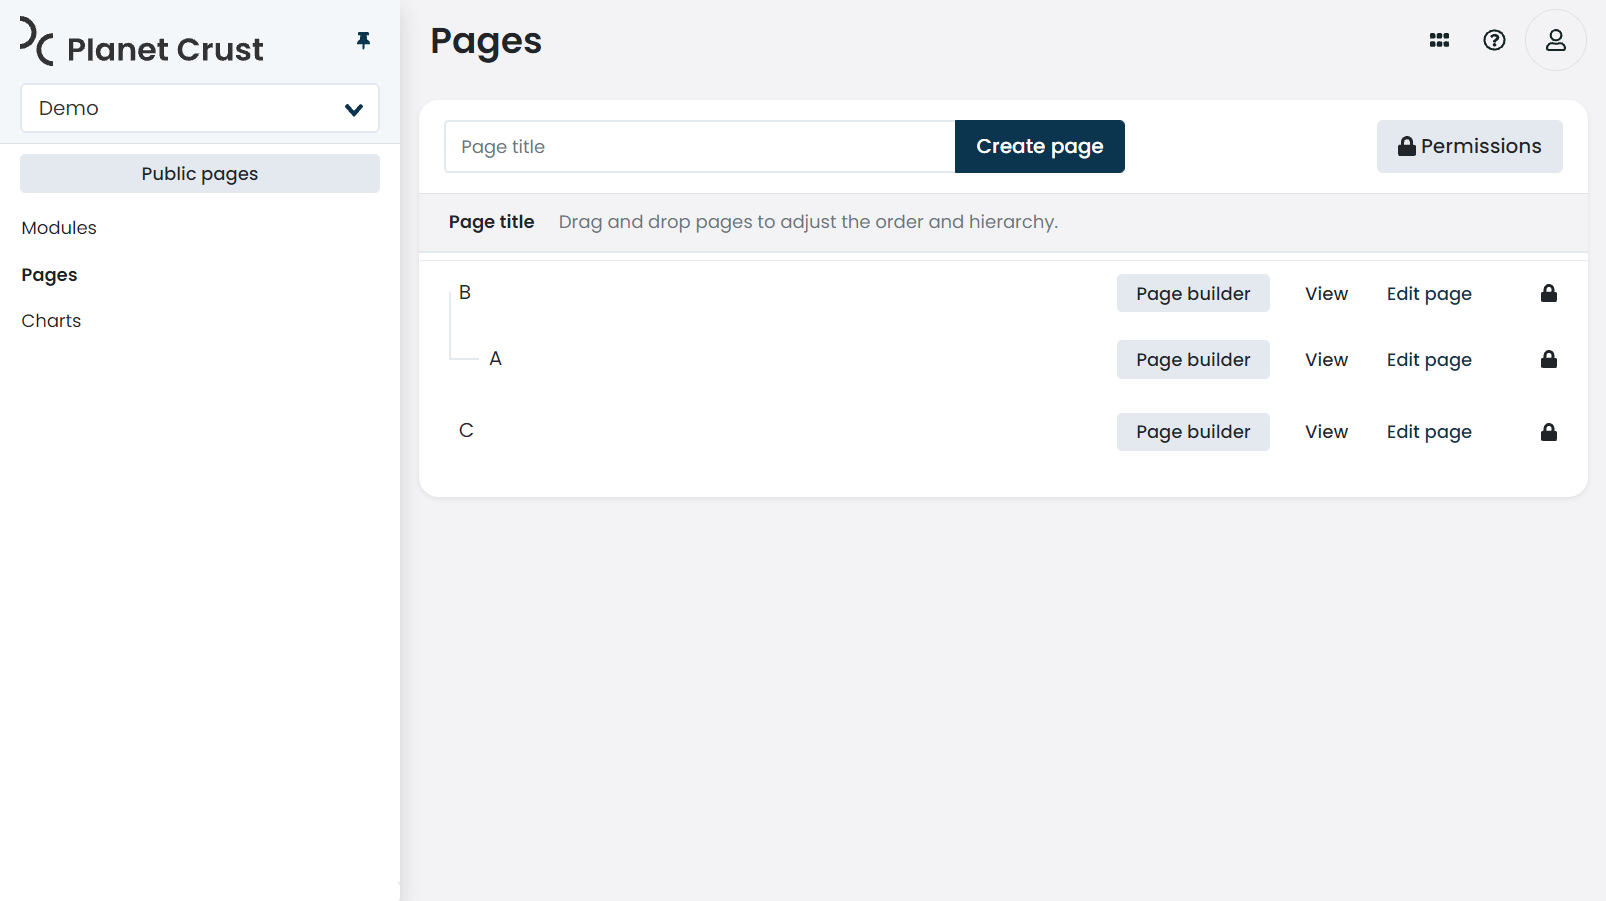
The page navigation of your application is generated based on your list pages and their position in the page tree. Navigate to the to see your current pages and how they are structured.
To change the order of pages, drag and drop the page to the desired position.

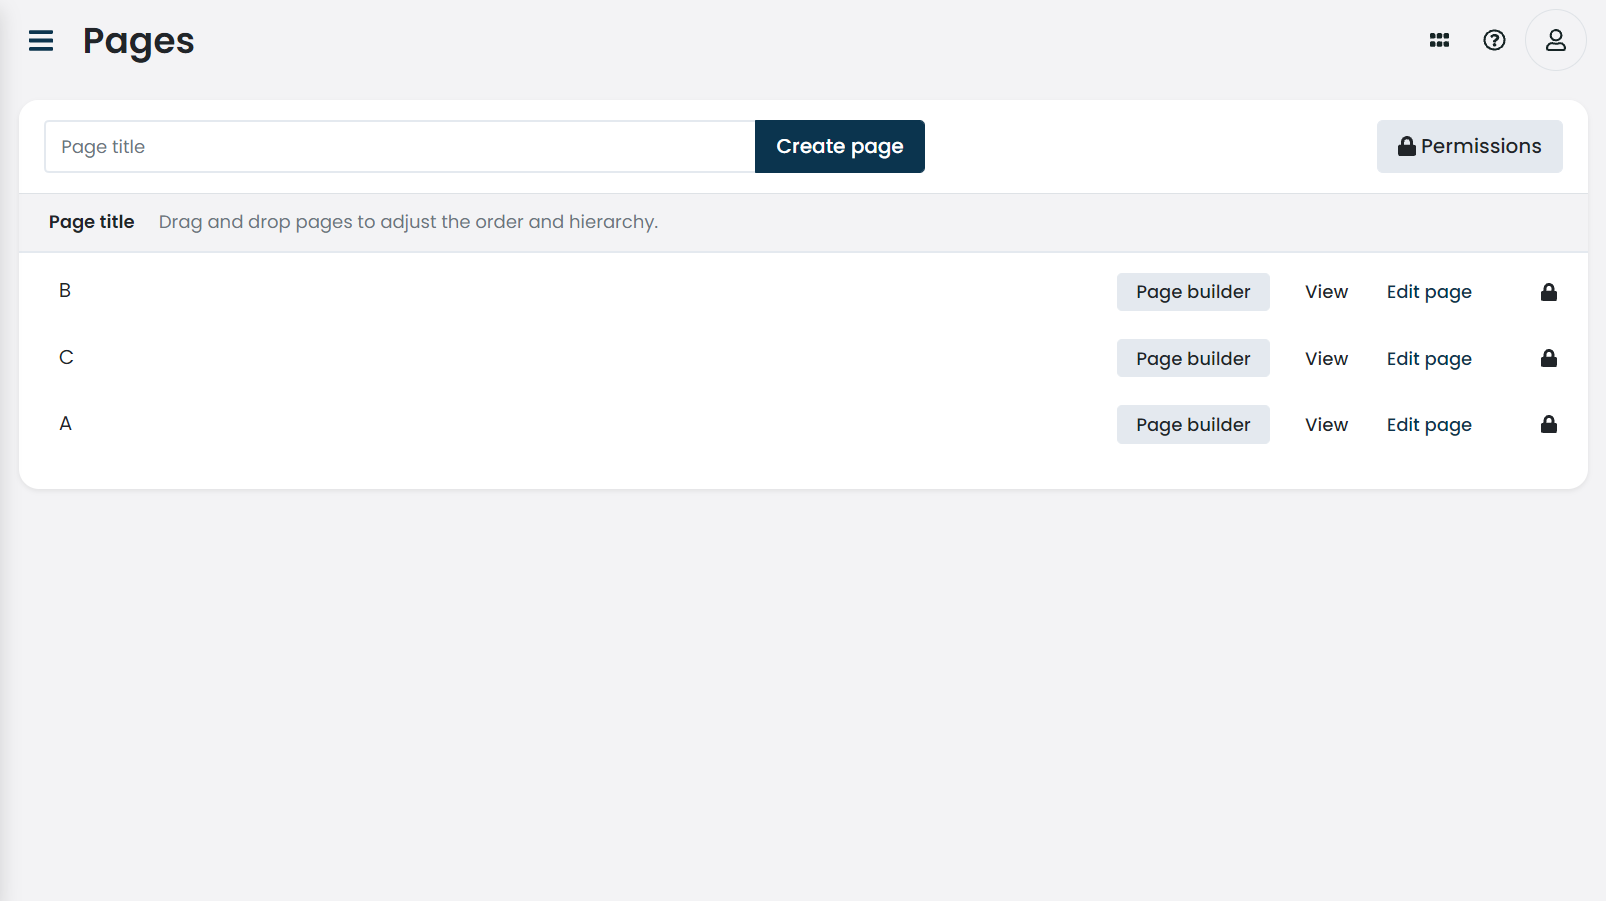

To create a dropdown menu (a sub-page or a nested page), drag and drop the page into another page.
Module fields
A module field defines the shape of the modules' records (what parameters will we store), what data type specific parameters are, and additional settings to control how the field should behave. Each module can have multiple module fields.
To edit module fields, navigate to and click on the module you wish to edit. The module fields are listed in the "manage module fields" section, below the module metadata.
A field name defines how the value is stored internally and what key is used when accessing the value from an automation.
A field name should be short and descriptive. There is a limit of 64 characters imposed. A name field must conform tho the following constraints:
|
|||
A field title defines what label is used when presenting the field and the value to the user. The field name should be short, descriptive, and modeled after the field title. If you omit the title, the name is used instead. |
|||
A field type defines what type of data the field stores.
For example, if we wish to store email addresses of our users, the field type will be Refer to the Field Type Reference section for more details regarding field types. |
|||
Base field settings control the general behavior of the module field. Base field settings are accessible directly under the "Attributes" column of the module field list.
|
|||
Type-specific field settings control the behavior of the module field based on the field type. To access type-specific settings, click on the settings icon next to the field type and navigate to the second tab (the one with the same name as the field type). Refer to module field type reference for details. |
|||
Field expressions allow you to define a formula (calculated) field. When a field defines an expression, the value is updated by the system when the result of the expression changes.
Click on the settings icon next to the field type and navigate to the "General" tab. Check the "field value expression" checkbox and insert the formula into the new input box. Refer to the field expressions for more details. 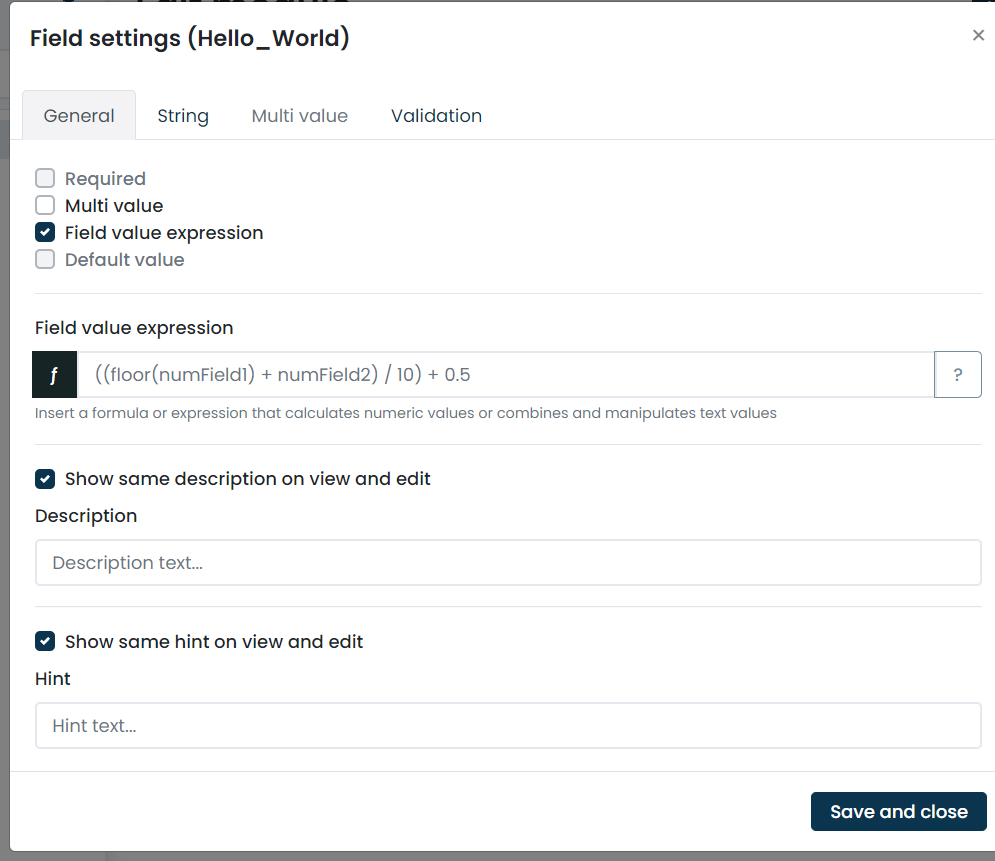
|
|||
Value sanitizers allow you to implement custom value sanitization (value transformation) before the value is stored. Value validators allow you to implement custom value validation before it is stored. Click on the settings icon next to the field type and navigate to the "Validation" tab.
Refer to the field expressions for more details. 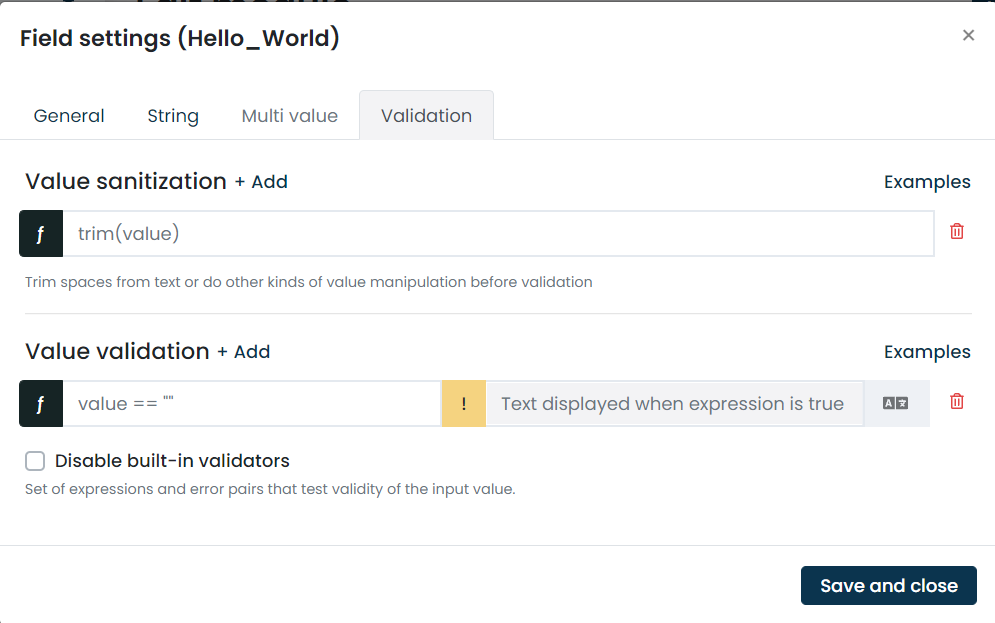
|
Chart configuration
Generic chart configuration
-
bar charts
-
line charts
-
pie charts
-
doughnut charts
The module specifies the data source (what records to use) for the chart. The chart can only show records of the same namespace that the chart was created in. |
|||
The filter allows you to define what records you wish to show in the chart. For example, you wish to aggregate the leads that you created in the last month. The dropdown menu provides you with a selection of the most common filters. Click on the "customize filter checkbox" if you wish to modify the selected filter or to write your own. Refer to the QL reference for details regarding filter definition. |
|||
The y-axis section allows you to configure the position of the axis (left or right), the label, and minimum, as well as maximum, values. |
|||
The dimensions section allows you to specify what field is to be used to plot the dimension; the x-axis.
You may only use simple, single-value fields as dimension fields:
Field of the |
|||
The metric section allows you to specify what field is to be used to determine each dimension’s value and how it is to be plotted. You may only use numeric fields as dimension fields.
A special |
Funnel chart configuration
A funnel chart is constructed from a series of reports where each report may define its dimension and metric. This allows you to piece together reports from different modules, which allows you to visualize the data between multiple modules.
The module specifies the data source (which records to use) for the chart. The chart can only show records of the same namespace that the chart was created in. |
|
The filter allows you to define what records you wish to show in the chart. For example, you wish to aggregate the leads that you created in the last month. The dropdown menu provides you with a selection of the most common filters. Click on the "customize filter checkbox" if you wish to modify the selected filter or write your own. Refer to the QL reference for details regarding filter definition. |
|
The dimensions section allows you to specify what field is to be used to plot the dimension. Only fields of type |
|
The metric section allows you to specify what field is to be used to determine each dimension’s value. You may only use numeric fields as dimension fields.
The |
Gauge chart configuration
The module specifies the data source (what records to use) for the chart. The chart can only show records of the same namespace that the chart was created in. |
|
The filter allows you to define what records you wish to show in the chart. For example, you wish to aggregate the leads that you created in the last month. The dropdown menu provides you with a selection of the most common filters. Click on the "customize filter checkbox" if you wish to modify the selected filter or write your own. Refer to the QL reference for details regarding filter definition. |
|
The dimensions section allows you to specify what field is to be represented on the gauge.
Only fields of type Each dimension has a series of steps that can be added by clicking on the + Add button. Each step defines a label and the maximum value for the step. The colours are defined based on the set colour scheme. |
|
The metric section allows you to specify how the value of the gauge is calculated. You may only use numeric fields as dimension fields.
The |
Page builder
|
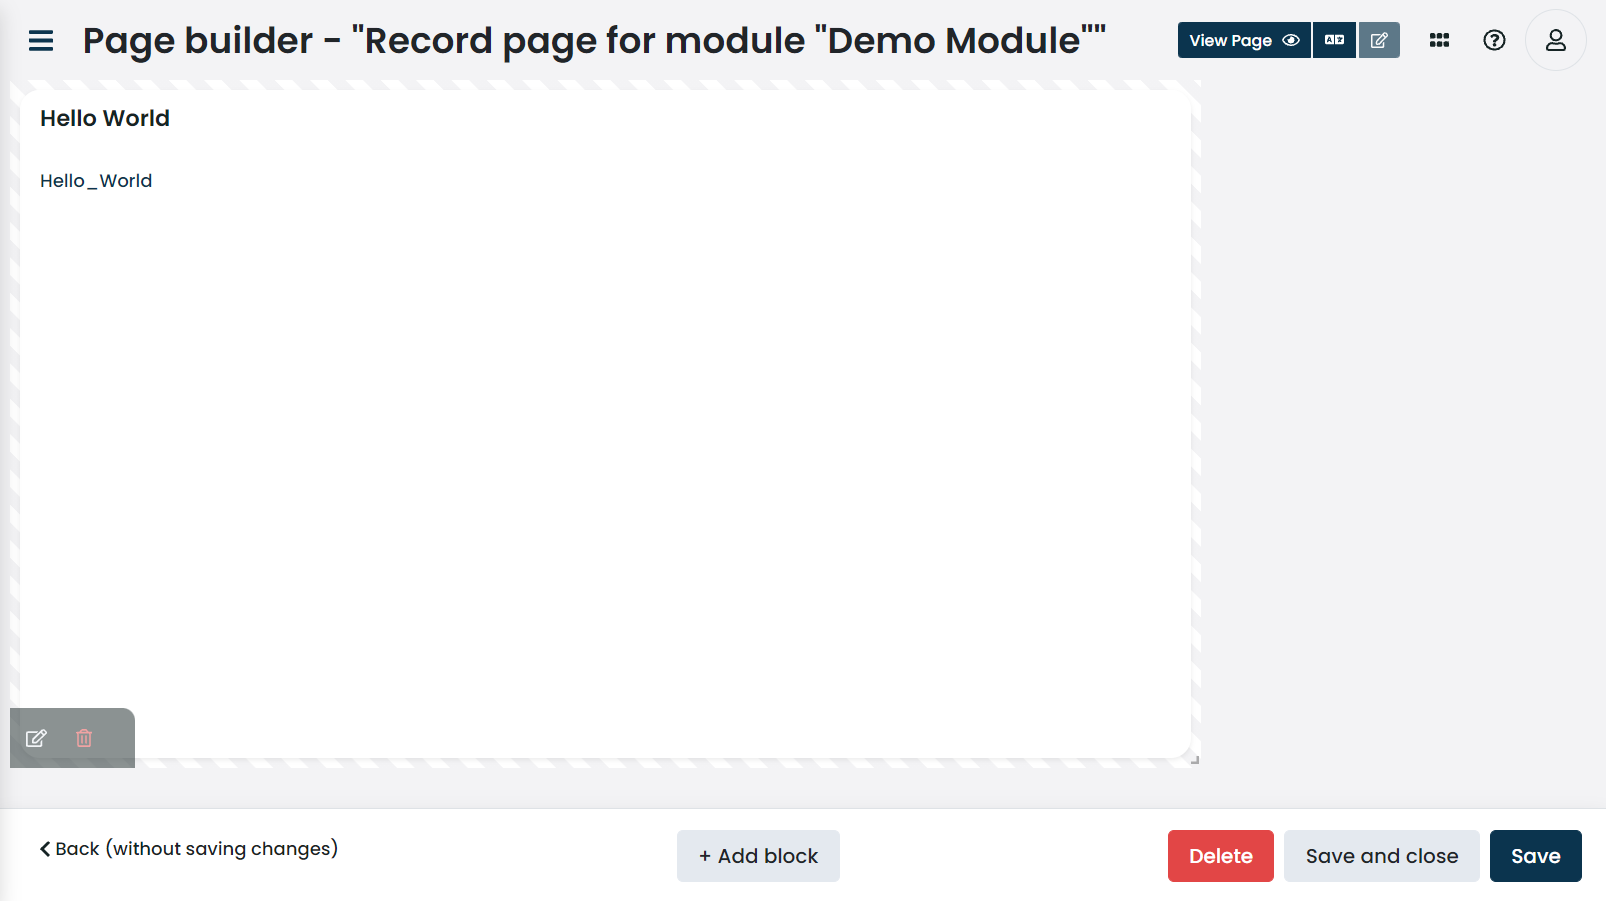
If all page blocks are on the same y-axis (one single row), the page will stretch the blocks to fill the entire page. This is useful when creating record or list pages with a single page block that should span the entire page.
|
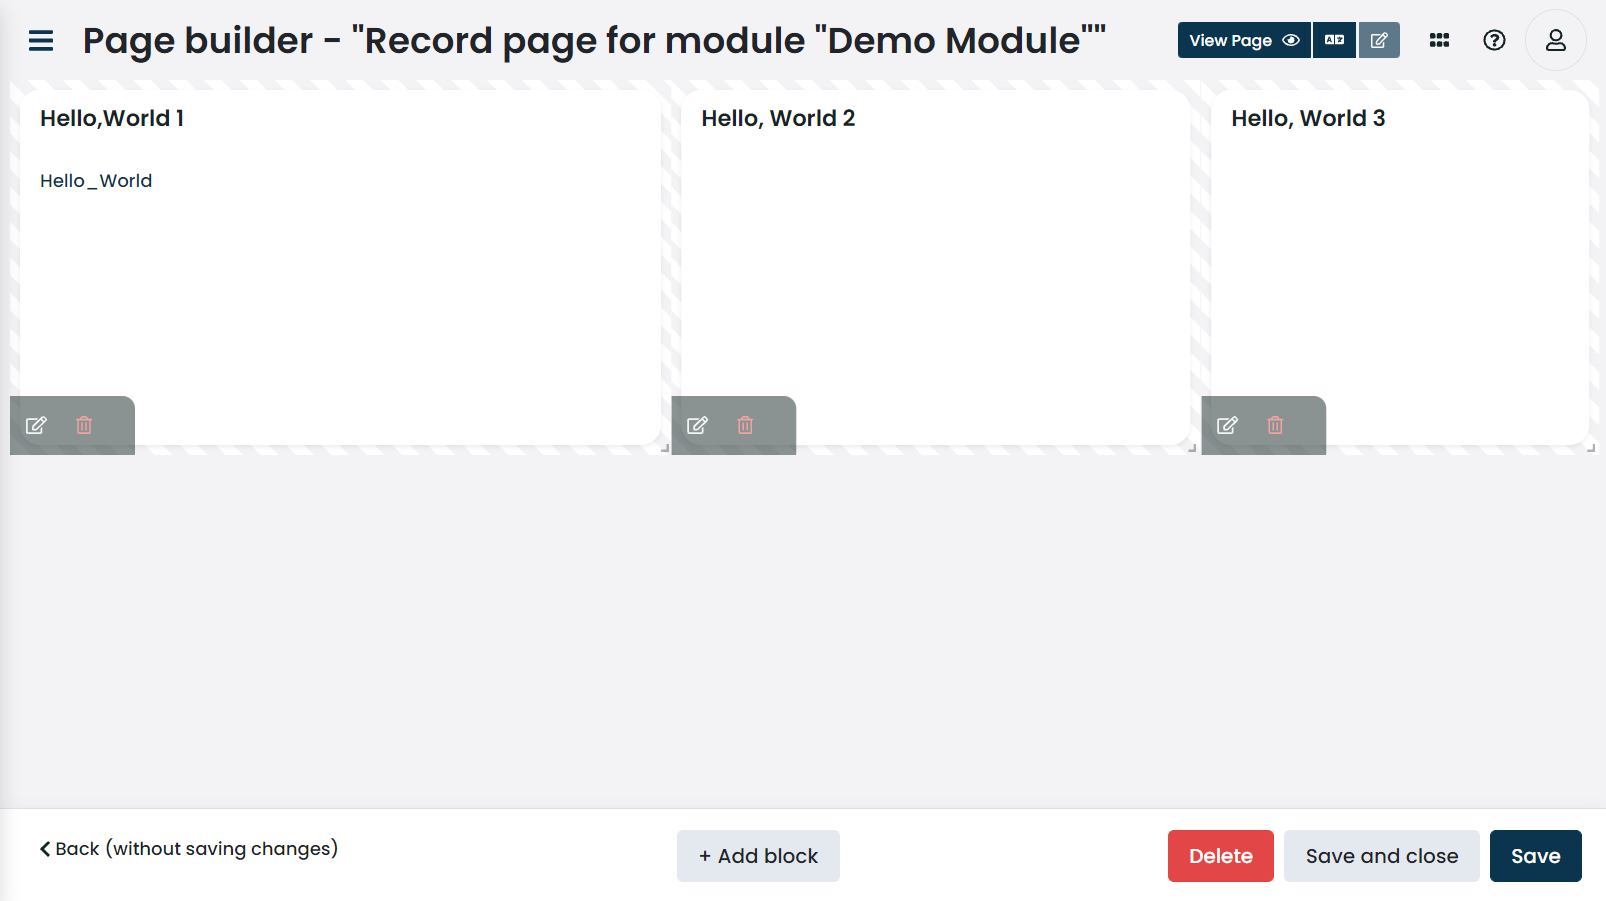
The page builder is used to define the pages' structure using page blocks and a drag-and-drop interface. Each page has a grid of 12 columns and is not limited vertically.
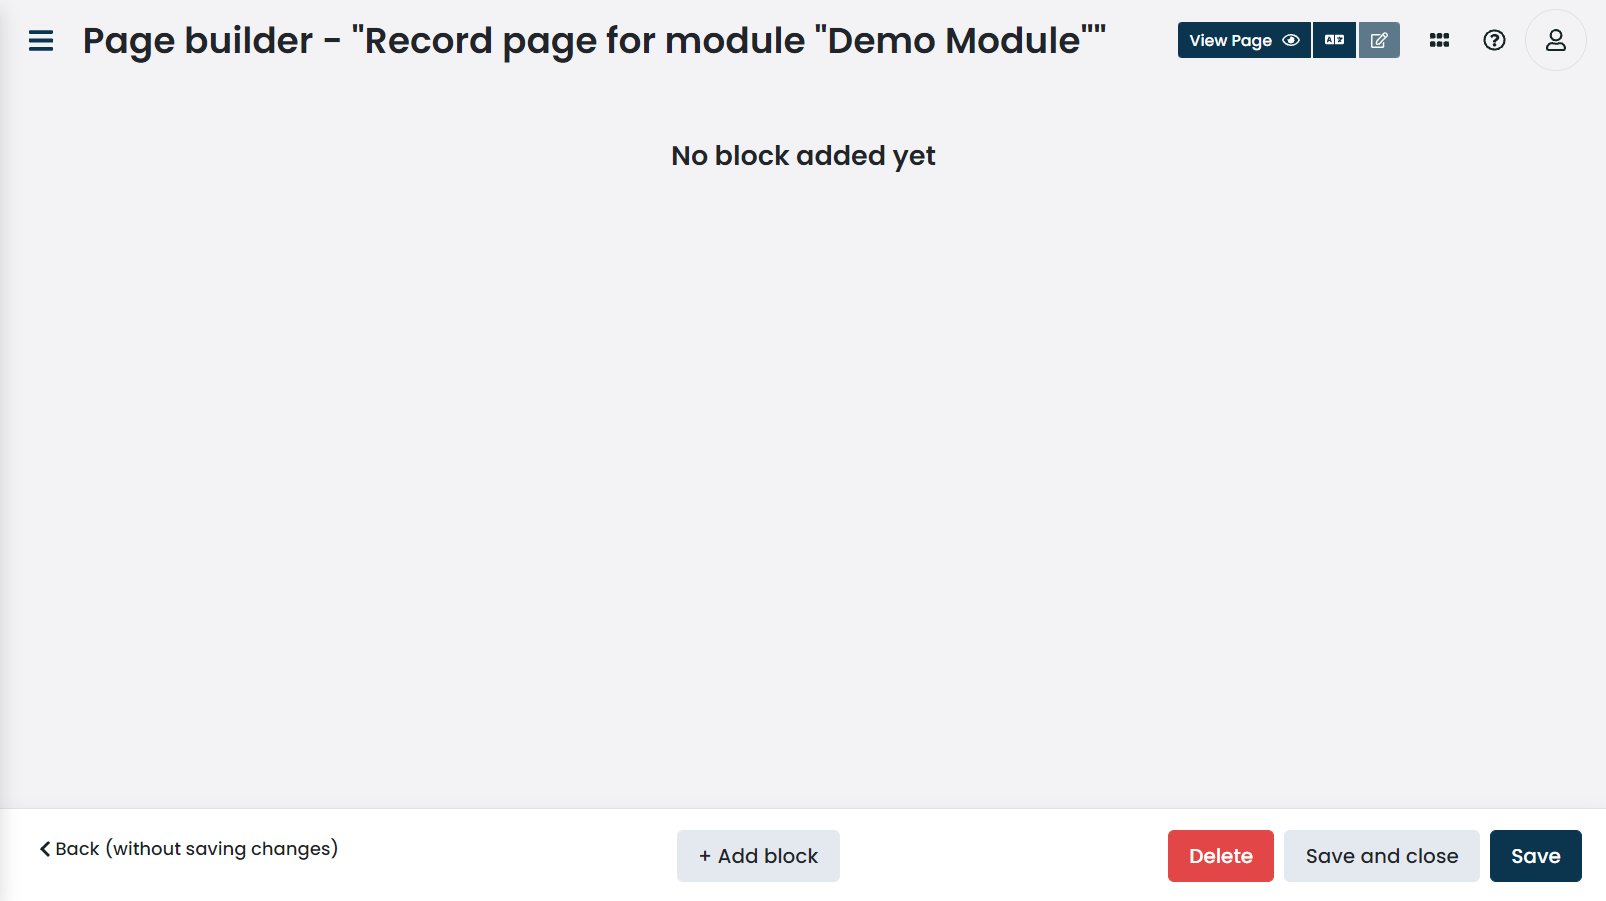
Click on the + Add block button to open the page block picker where you can configure and add a new page block. The entire page block reference is available here.
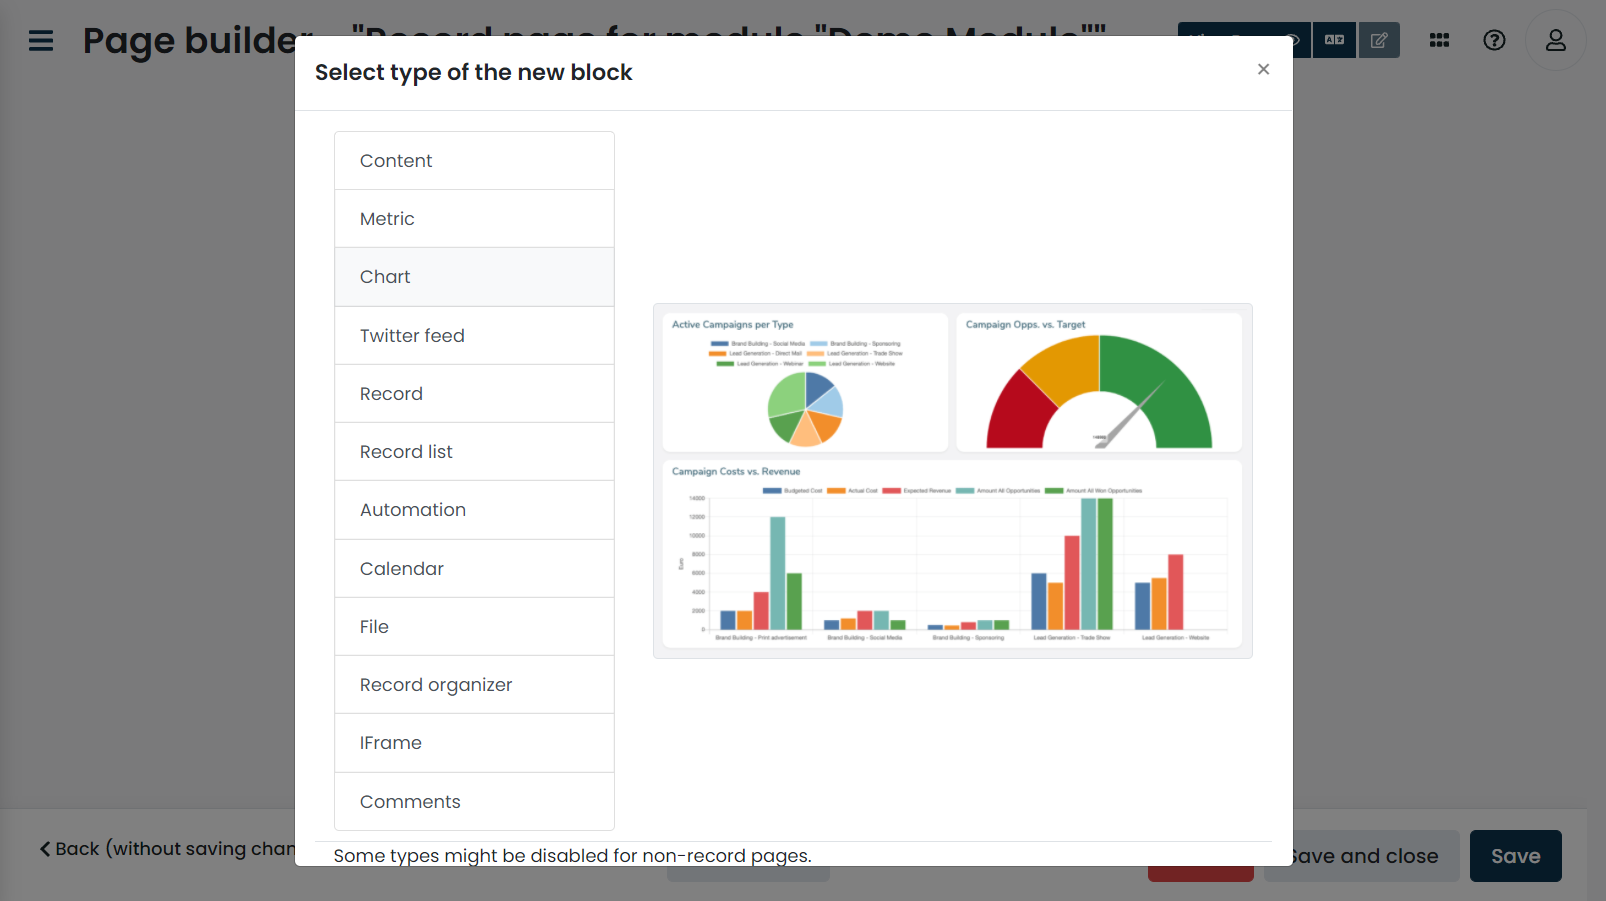
When you configure and save a page block it is added to the page.
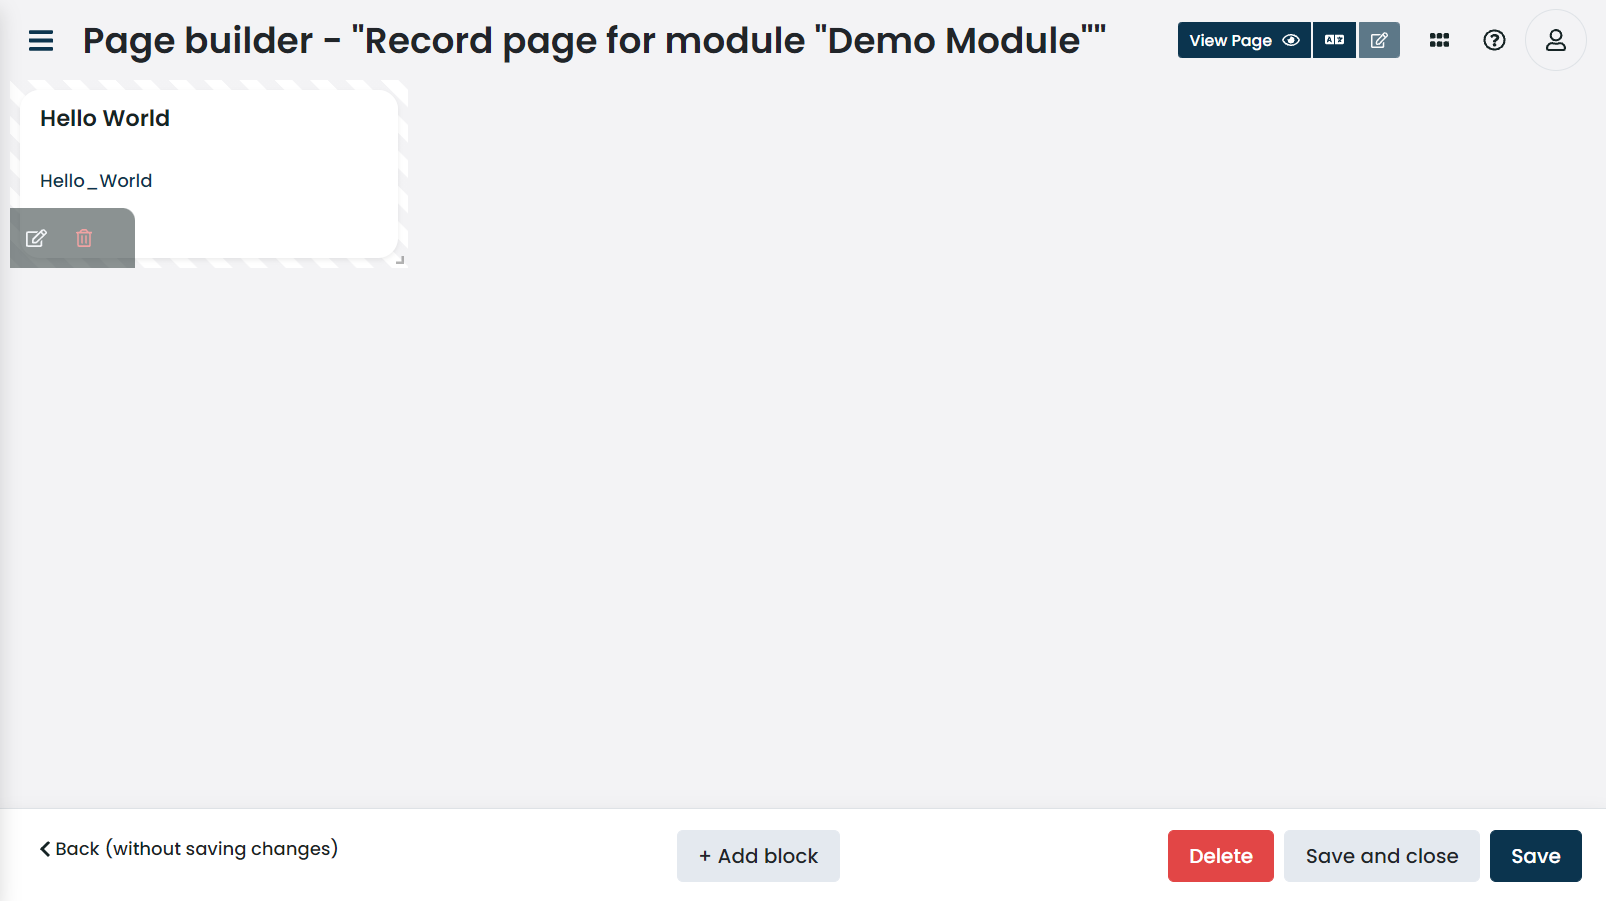
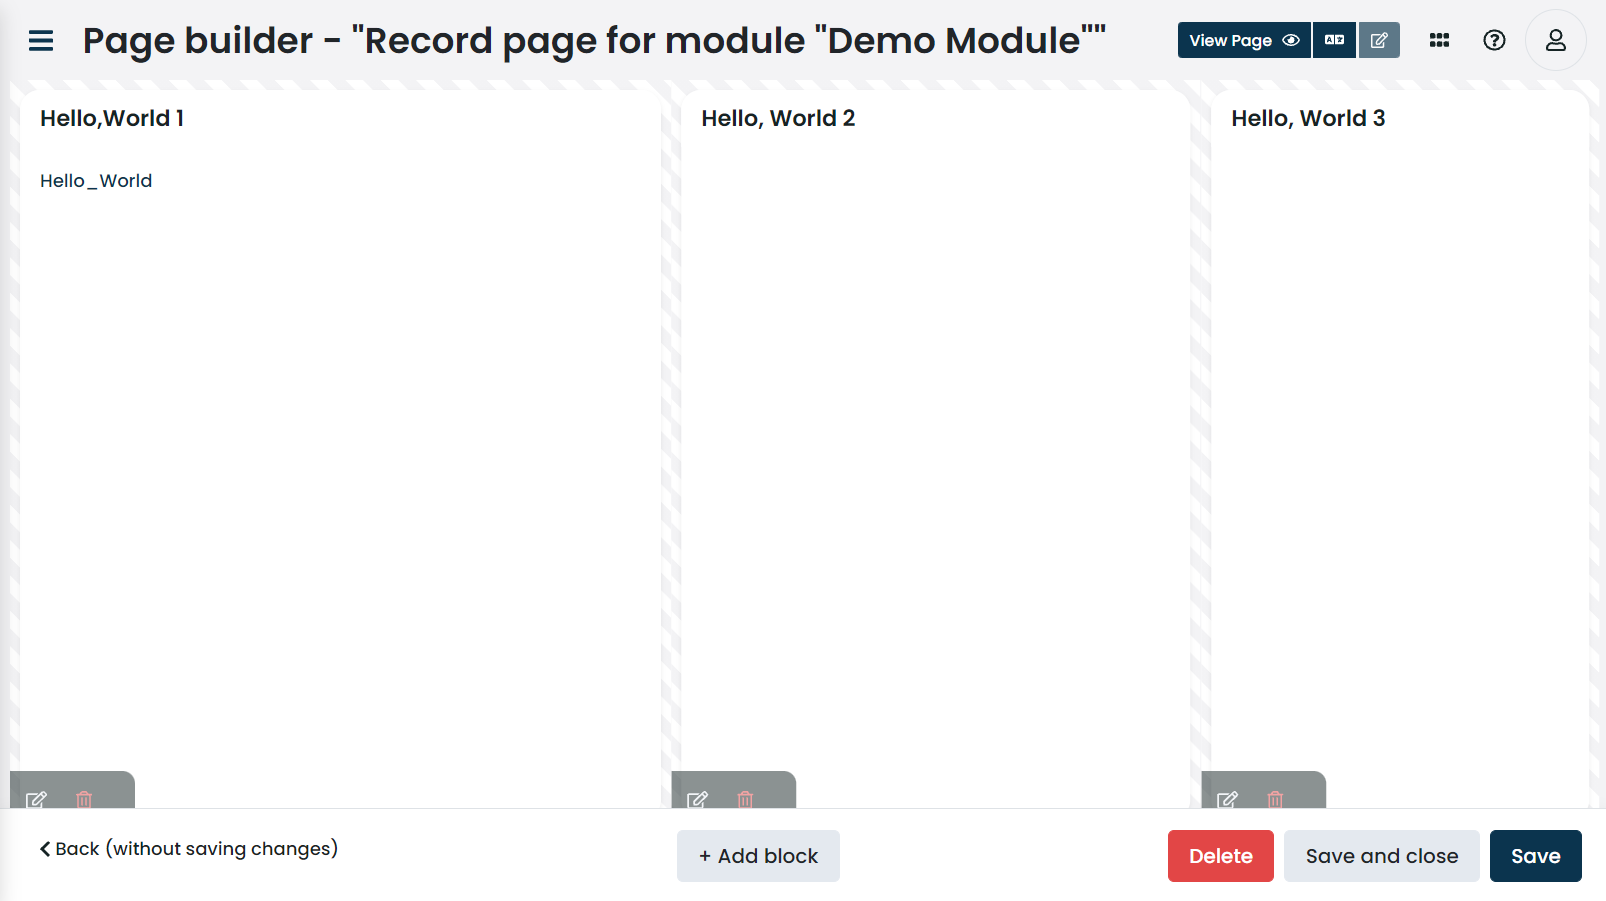
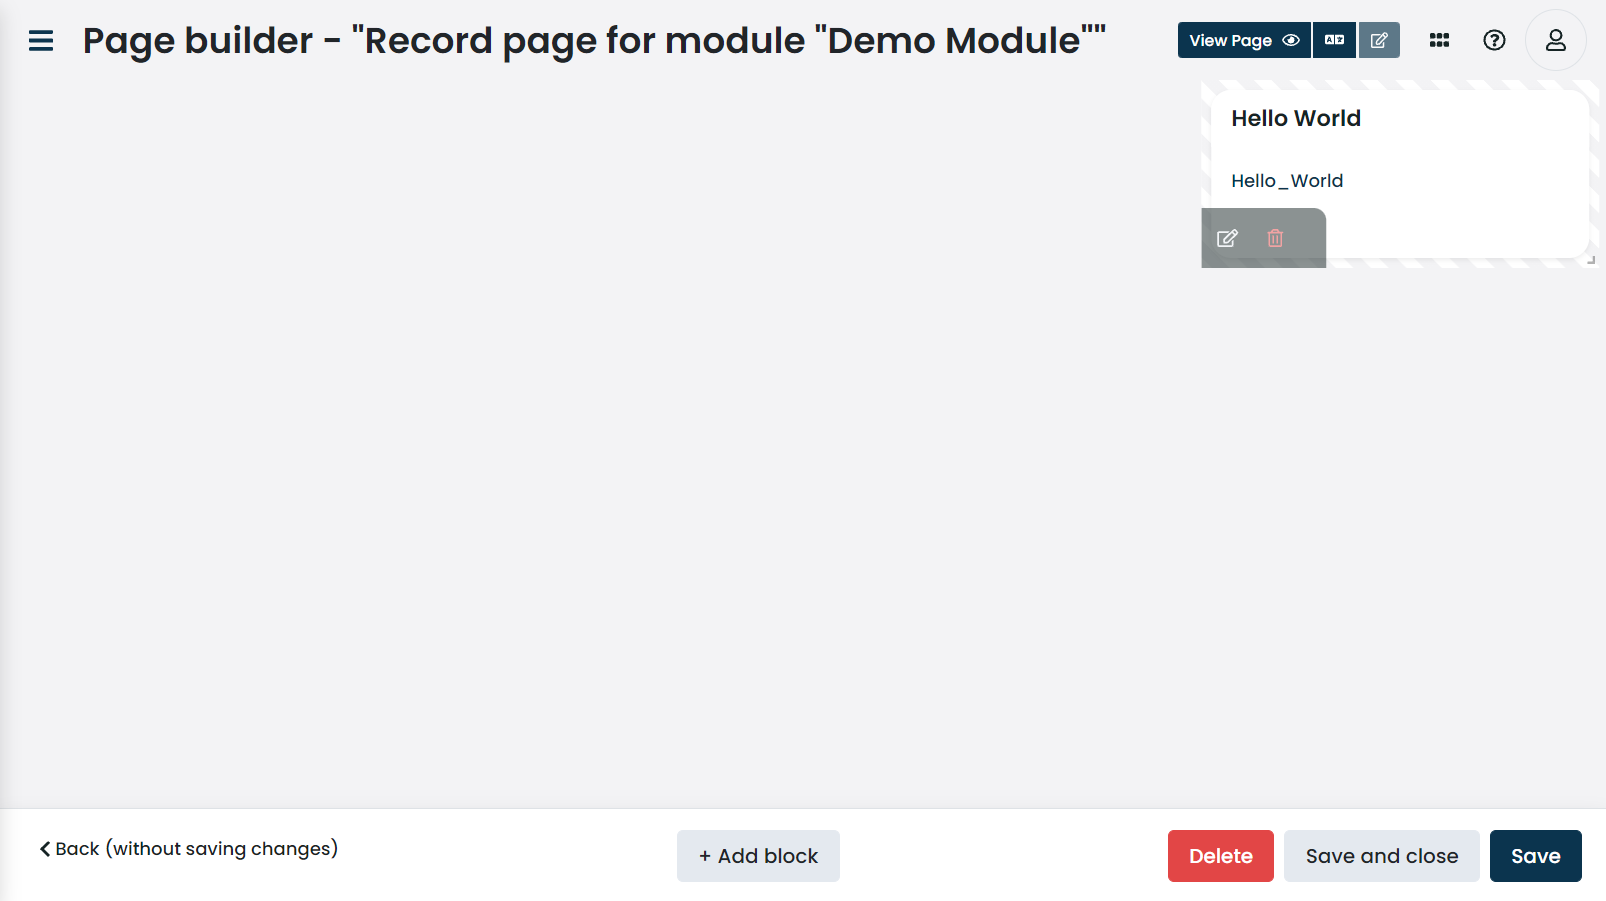
To reposition the page block, simply drag-and-drop it to the desired position.
The page block may be placed anywhere on the x-axis, but its y-axis must connect with another page block or with the top of the page. If the position is not valid, or it overlays with another page block, they page builder may automatically adjust the surrounding page blocks to conform to the constraints.
To resize the page block, simply grab the arrow in the bottom-right corner and resize to your needs. The page block may not exceed the maximum width of 12 columns. The height is not limited.
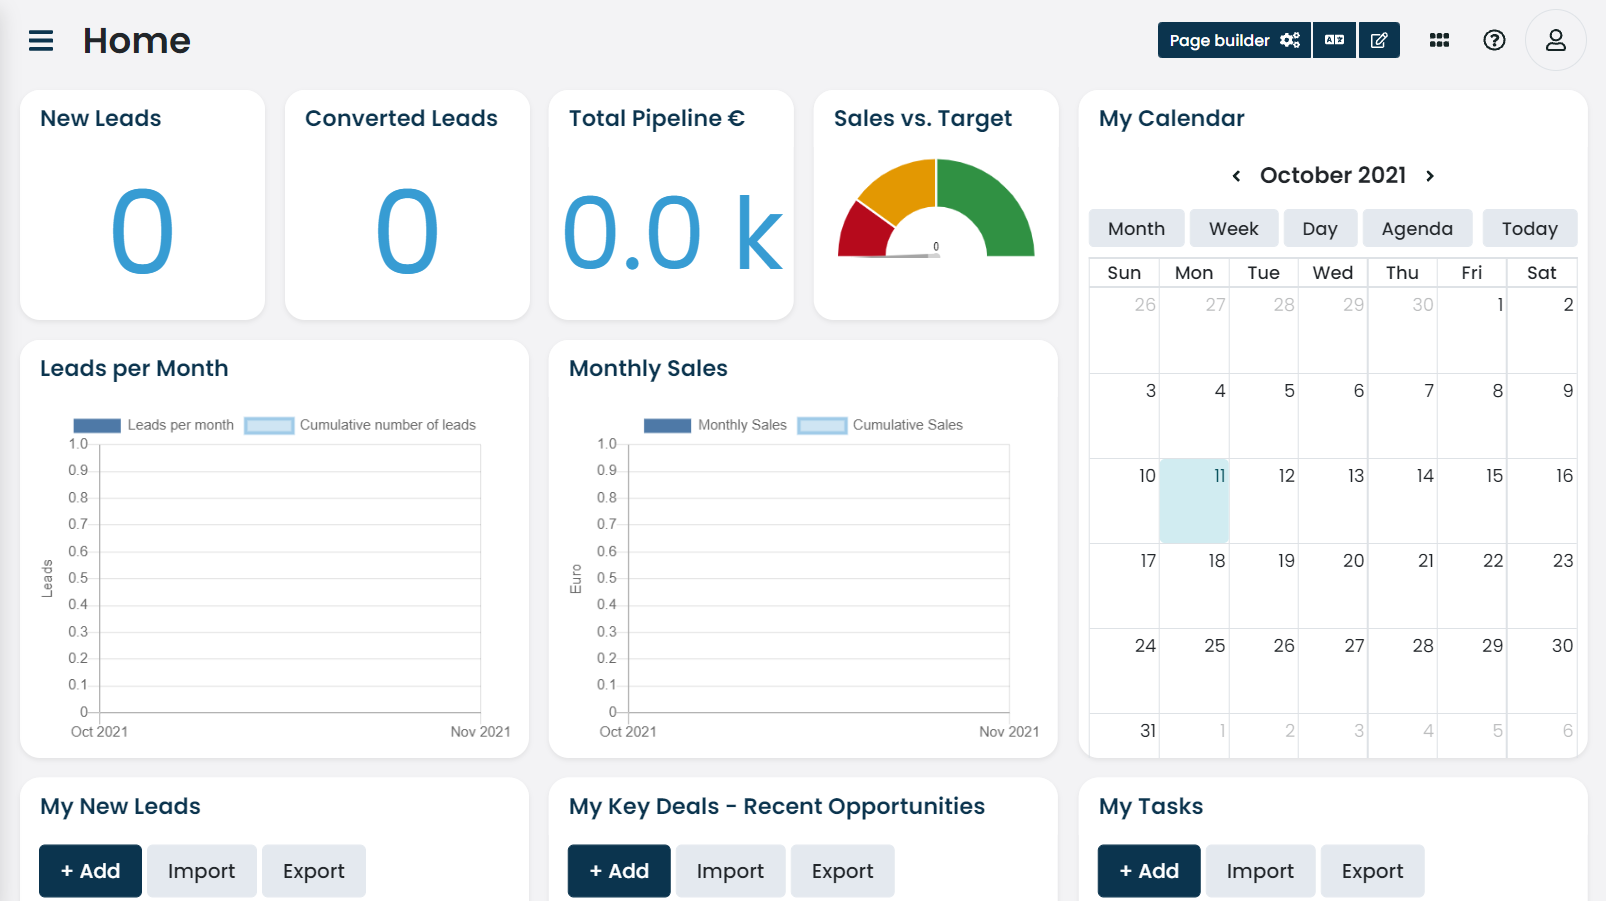
By placing a few extra blocks and changing their layout, you can create interesting home pages and dashboards like the CRM’s.
Field expressions
Value expressions
Value expressions calculate the fields' value based on the provided expression. A value expression is a simple expression that results in a single value. If your field is a multi-value field, you need to return an array of items.
Refer to the Expressions for details on writing expressions.
|
Currently, you can only use values of the current record. References are not yet supported. If you need to reference data across multiple records, resort to using an automation instead. |
The |
|
The |
|
A string or an array of strings with current field values. If the field name collides with any of the system-defined variables, access the value via the new["field_name_here"]. |
price * 1.25trim(firstName + " " + lastName)["foo", "bar", "baz"]Sanitizers
Sanitizers modify the field value to cleanup (sanitize) the data before it is saved. A sanitizer is a simple expression that results in a single value.
Refer to the Expressions for details on writing expressions.
By their nature, sanitizers should not result in an error. If an error occurs, it is logged in the action log, and the operation continues.
If you define multiple sanitizers, they are run in the specified order.
length(value) > 5 ? substr(value, 0, 5) + "..." : valueThe |
Validators
Validators validate the field value by raising errors when the value is not valid.
A validator is a simple expression that results in a single value, either true or false.
The value validation is considered invalid when the expression results in true.
|
Validators can not change the field’s value. |
Built-in field validators can be disabled; required and unique-multi-value validators can not be disabled.
If you define multiple validators, they are run in the specified order.
|
The field validator stops when the first error occurs.
For example, if we define validators |
-
the value is not changed,
-
the value is missing.
|
Use the required flag to check for required values. |
The |
|
The |
|
The |
length(title) < 5